Composing AI Inference pipelines based on OSCAR services with Elyra in EGI Notebooks
ㅤCreate a pipeline with Elyra
Please, be aware that video demos can become quickly outdated. In case of doubt, always refer to the written documentation.
Tutorial update
OSCAR v3.6.5 now provides support for deploying a Jupyter Notebook instance with Elyra. Although the tutorial uses the EGI Notebooks service, you can also deploy your own Jupyter Notebook in OSCAR and try the examples of the tutorial. More info regarding this new OSCAR feature can be found here .
In this documentation, we provide a hands-on guide to using Elyra , an AI-centric extension for Jupyter Notebooks , within EGI Notebooks.
This tutorial will focus on:
how to use Elyra in EGI Notebooks
how to clone repositories using Elyra
how to interact with OSCAR, using the EGI Notebook Token.
how to deploy a pipeline to utilize inference services using OSCAR.
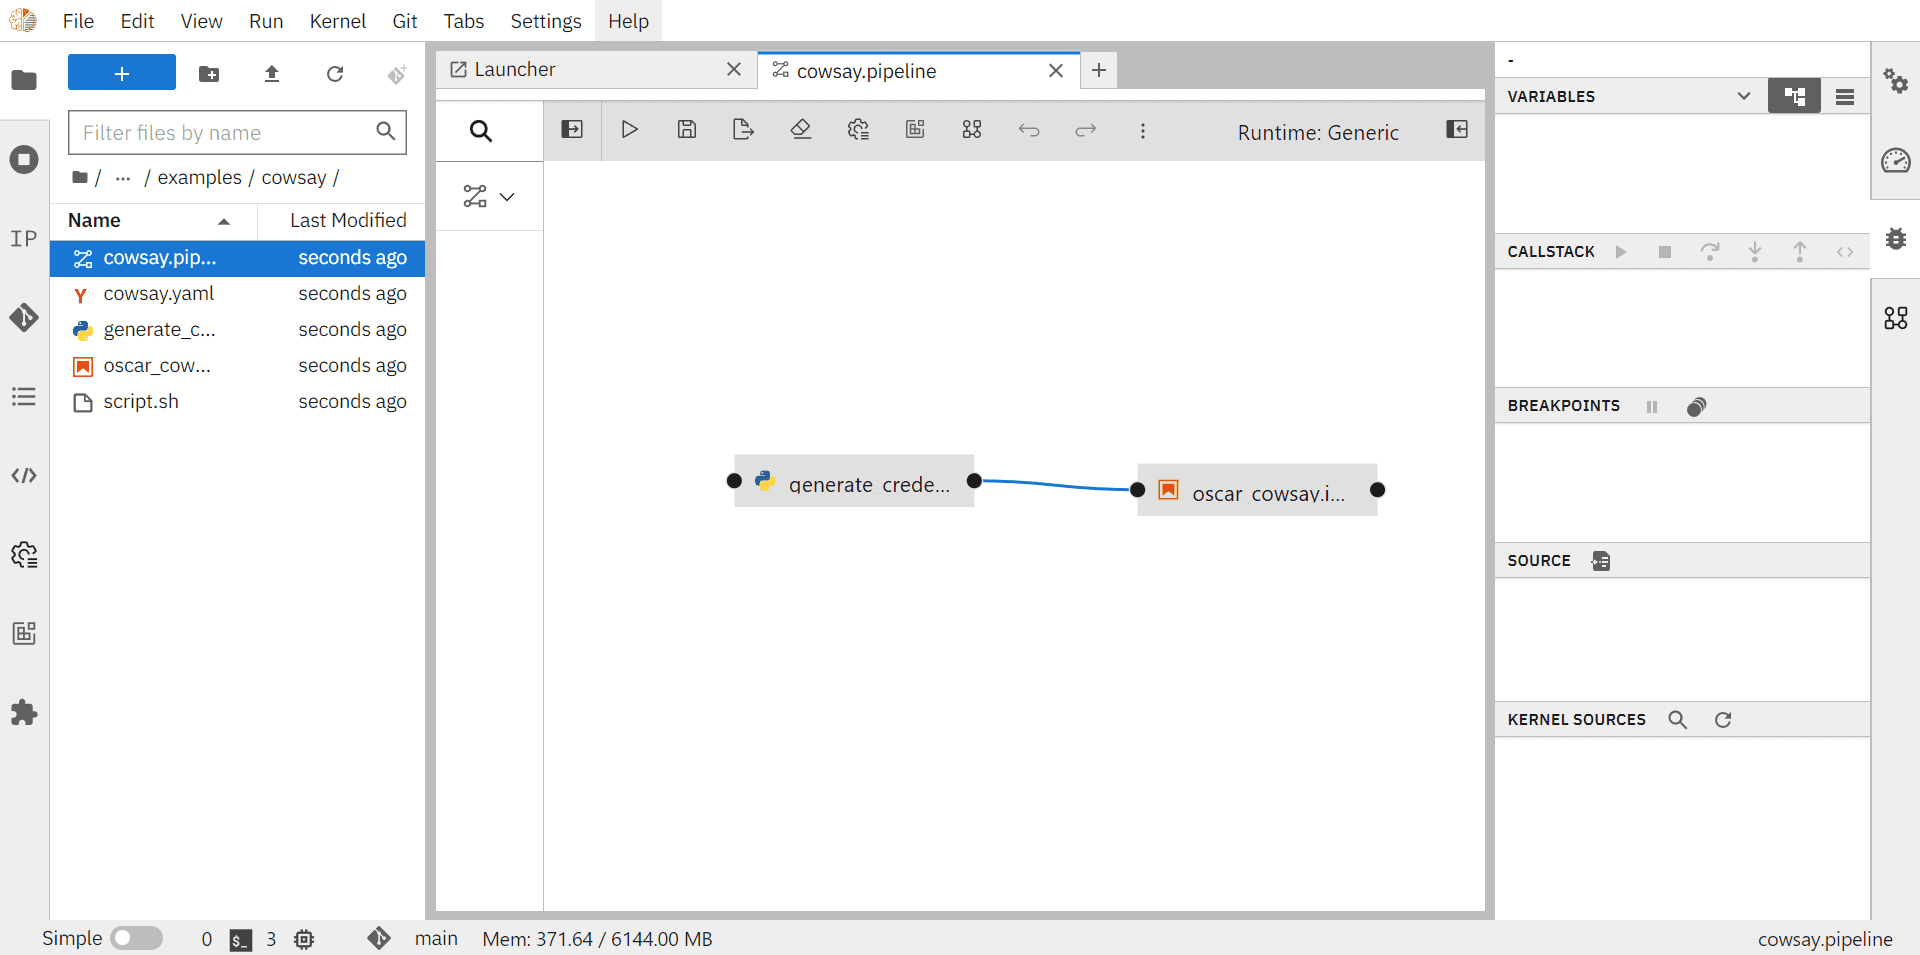
We will walk through the entire process, from setting up the initial environment to running specific OSCAR services like the Cowsay and others.
For a complete view of the repository containing these examples, please refer to the GitHub README.
1. Setting up the environment
1.1 Accessing EGI notebooks
The first step is to access the EGI Notebooks service.
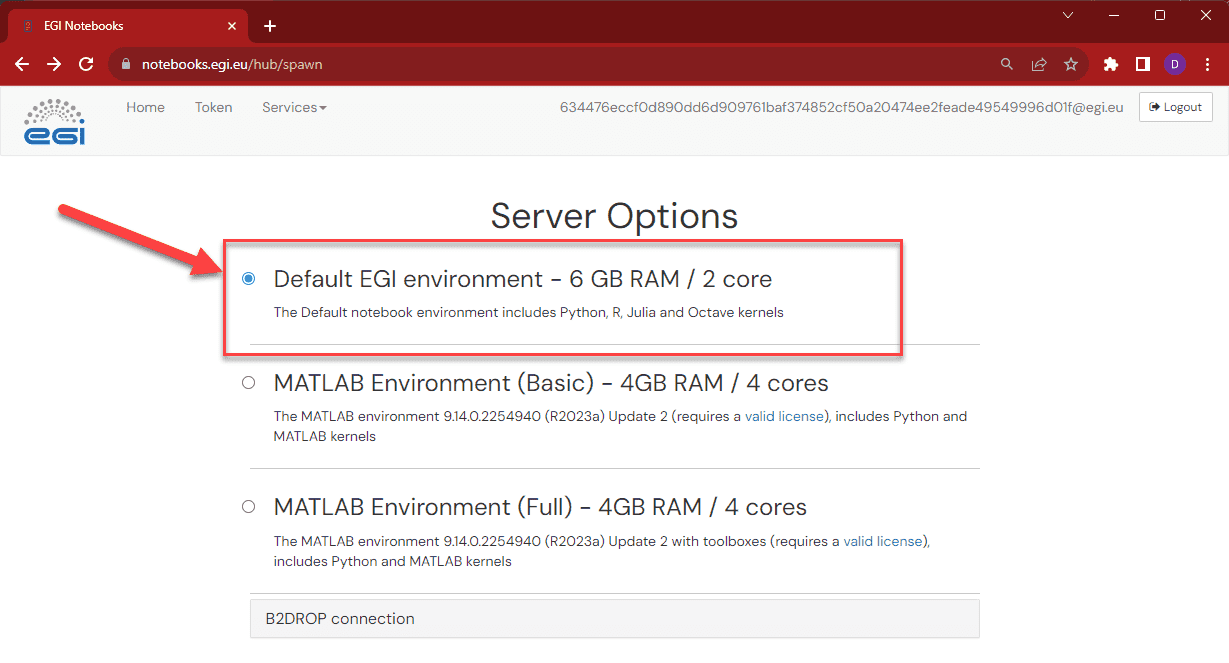
Then choose the preferred server option. We will select Default EGI environment:
For additional information on using EGI Notebooks, refer to the official documentation.
1.2 Importing OSCAR Elyra from Github
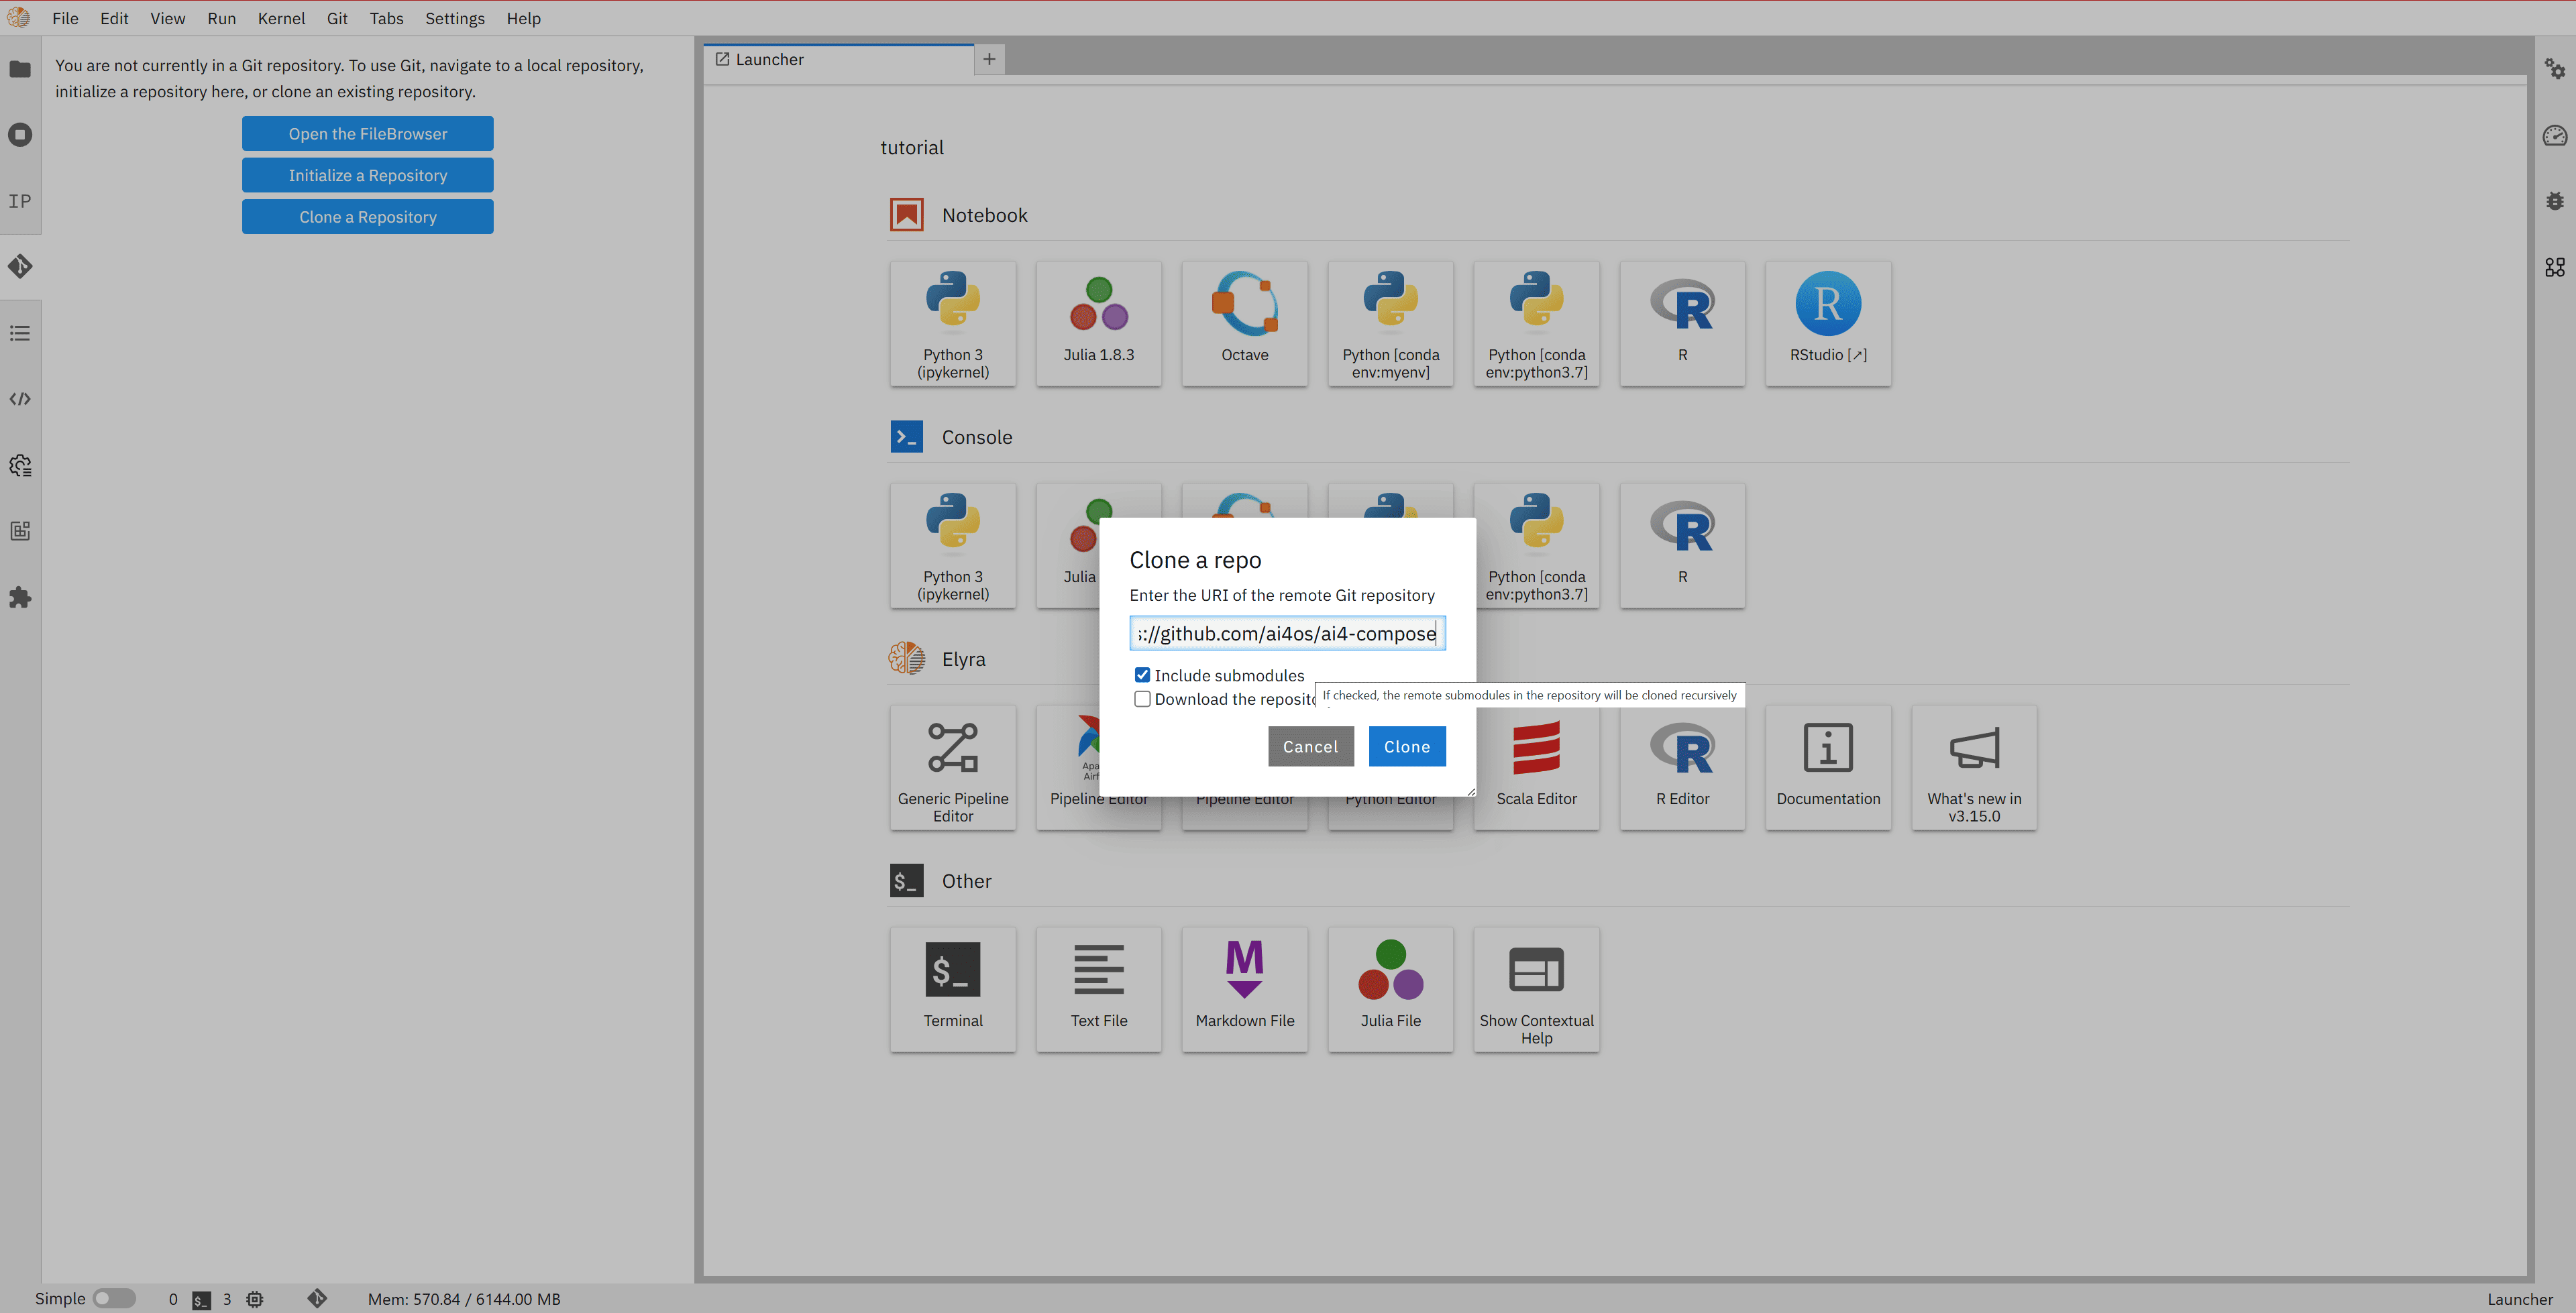
To get started, you will need to clone the repository that contains the example files for Elyra and OSCAR services: https://github.com/ai4os/ai4-compose
As a good practice to keep your workspace organized, you may first create a dedicated folder
(for example, called tutorial) inside your home directory in the EGI Notebooks environment.
You can then clone the repository inside this folder.
This is optional but recommended to avoid clutter in your main workspace.
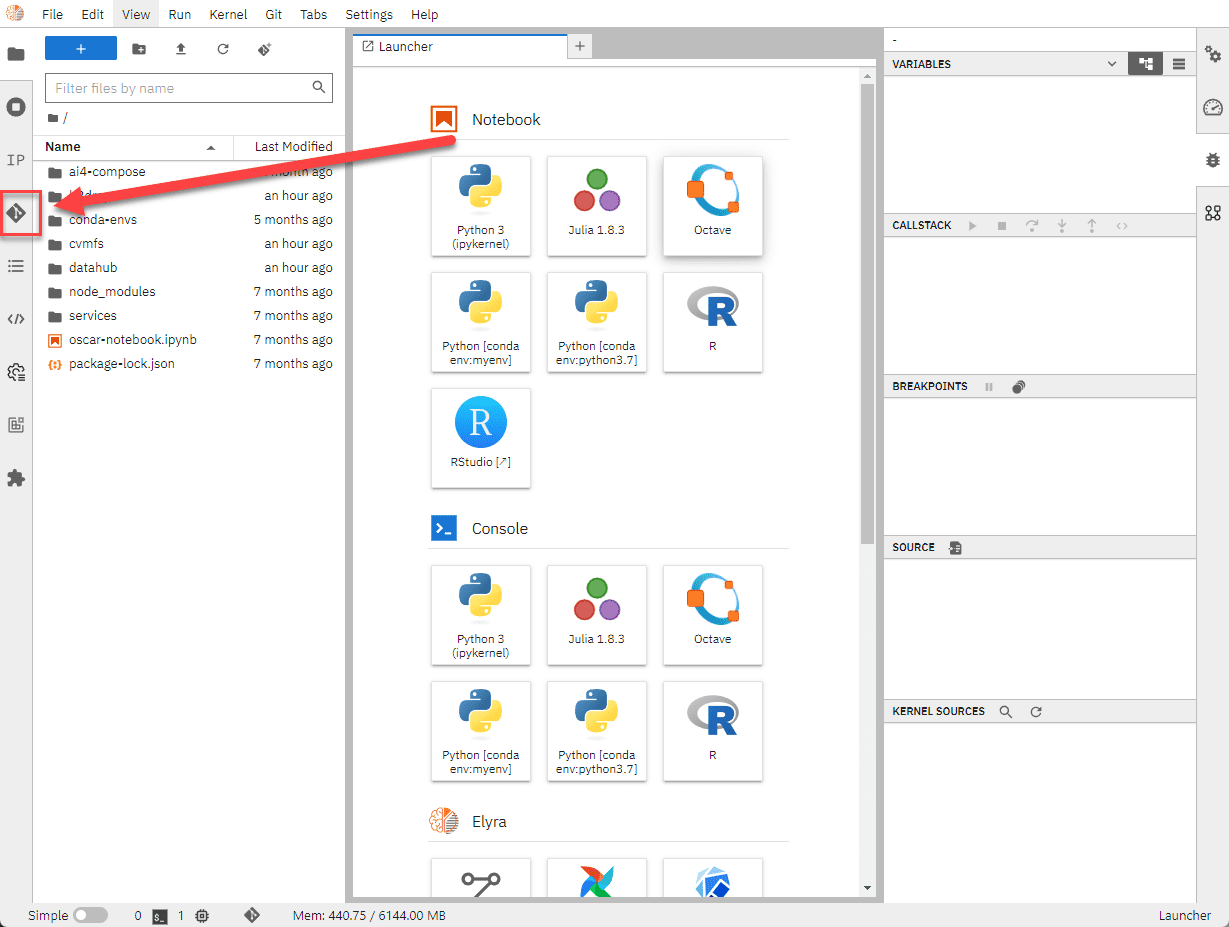
You can use the Elyra git tool on the left side panel to clone the repository in the EGI Notebooks environment. This repository contains various examples, including those for Elyra, such as Cowsay, Grayify, and Plants-Theano.
2. Prerequisites for all the examples
2.1 Using OSCAR in Your Workflow
To use nodes that rely on OSCAR, you need to invoke a service through an OSCAR client. First, create your own OSCAR client, configuring it with the necessary credentials and parameters to interact with an OSCAR cluster.
2.2 Setting Up an OSCAR Client
In this example, we will navigate to the examples folder, then into the cowsay folder, and open the cowsay.pipeline file. This pipeline is already set up with the nodes setup_client.py and invoke_service_cowsay.ipynb.
To configure the setup_client node, follow these steps:
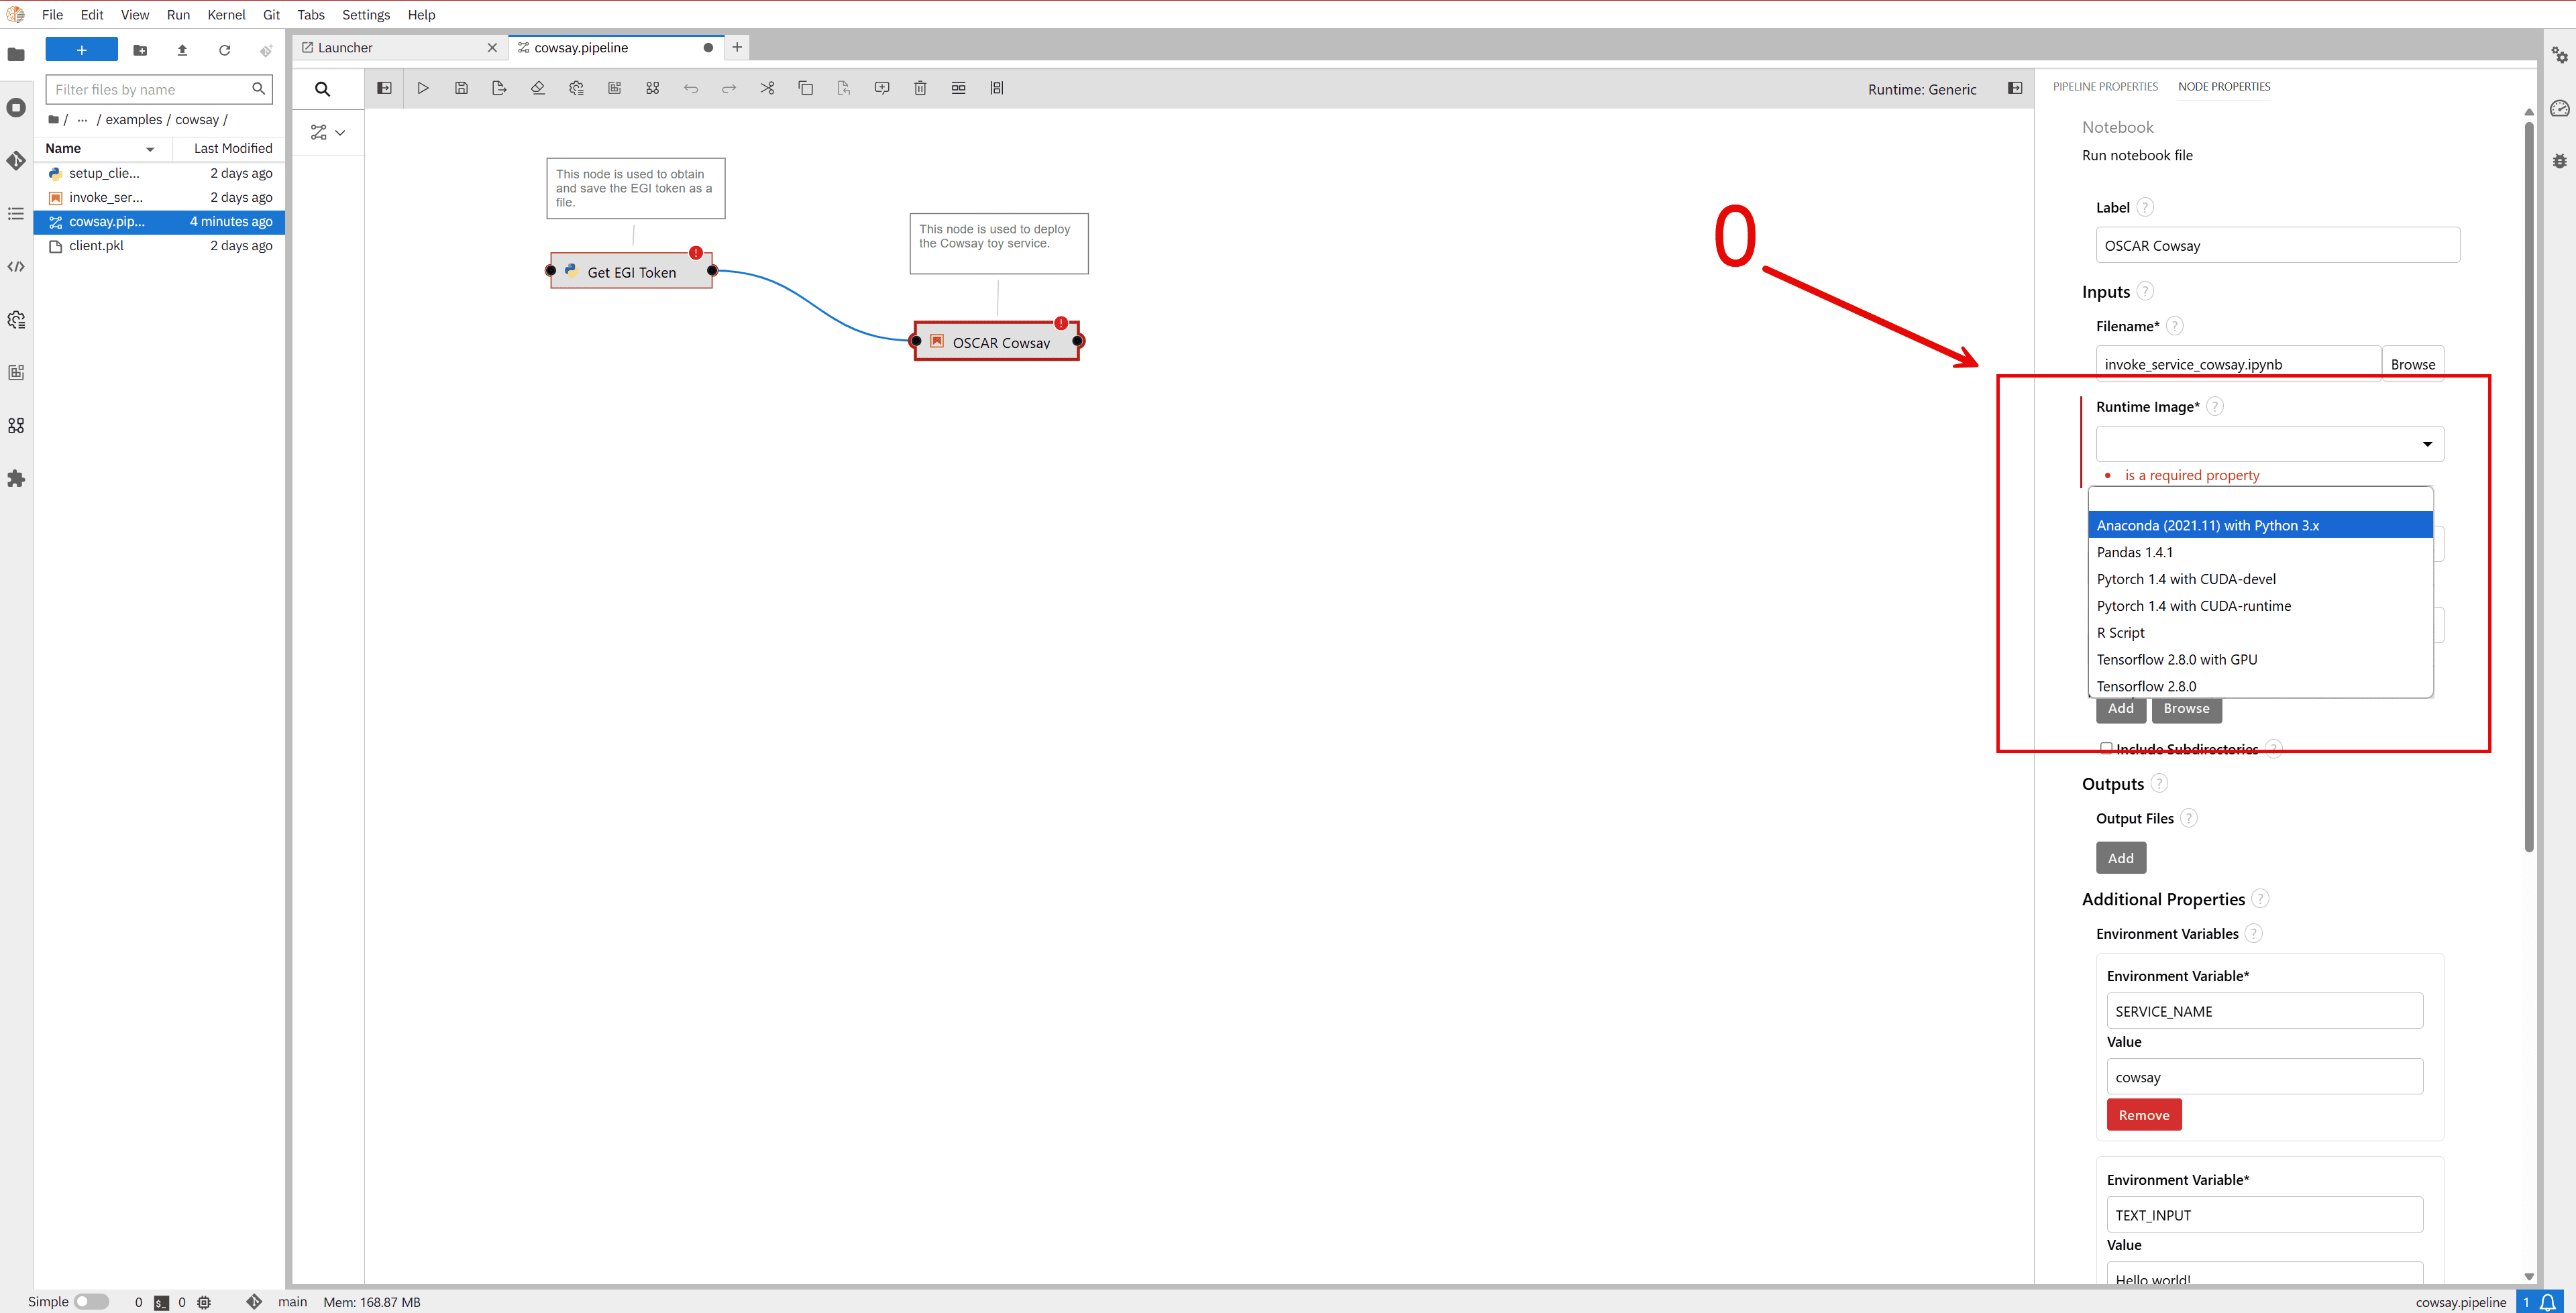
When creating a new node, or if a node has no configuration, it is necessary to assign a runtime image. You can choose from several options, but we recommend selecting:
Anaconda (2021.11) with Python 3.xThis will eliminate the
"is a required property"error, which causes the node to be marked in red and display an exclamation icon.
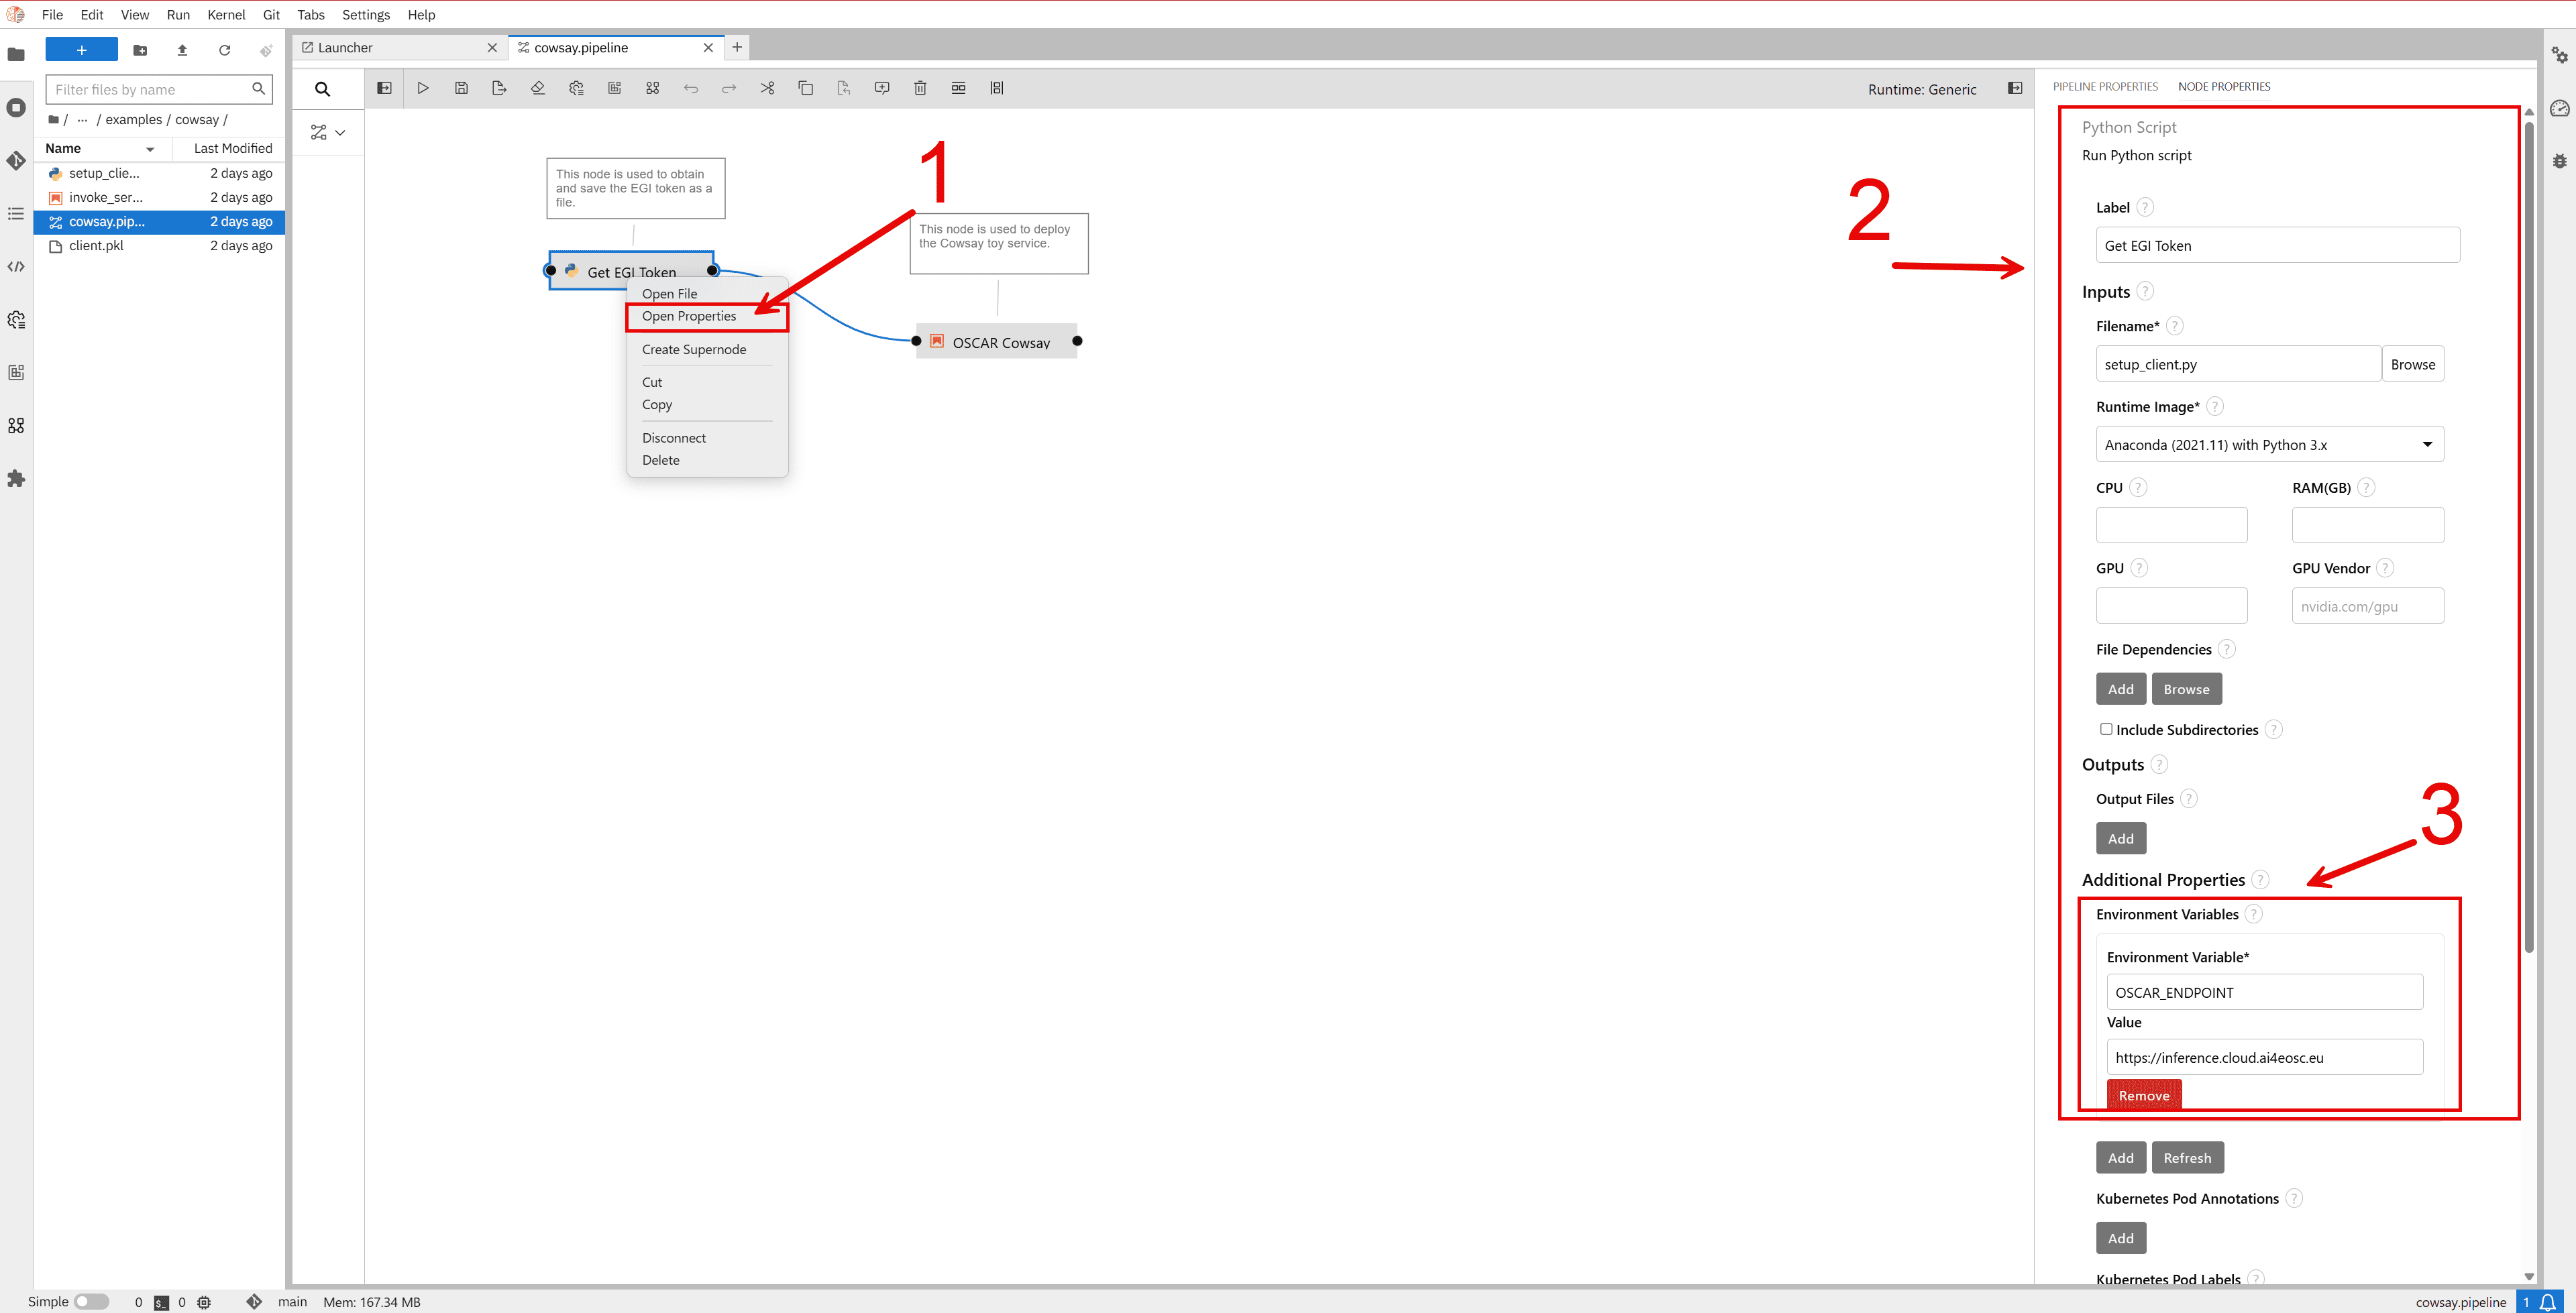
Right-click on the
setup_clientnode and select the Open properties option.Go to the side menu to access the configuration fields.
Set up the OSCAR client by obtaining the OSCAR endpoint. For AI4EOSC, the endpoint is:
https://inference.cloud.ai4eosc.eu
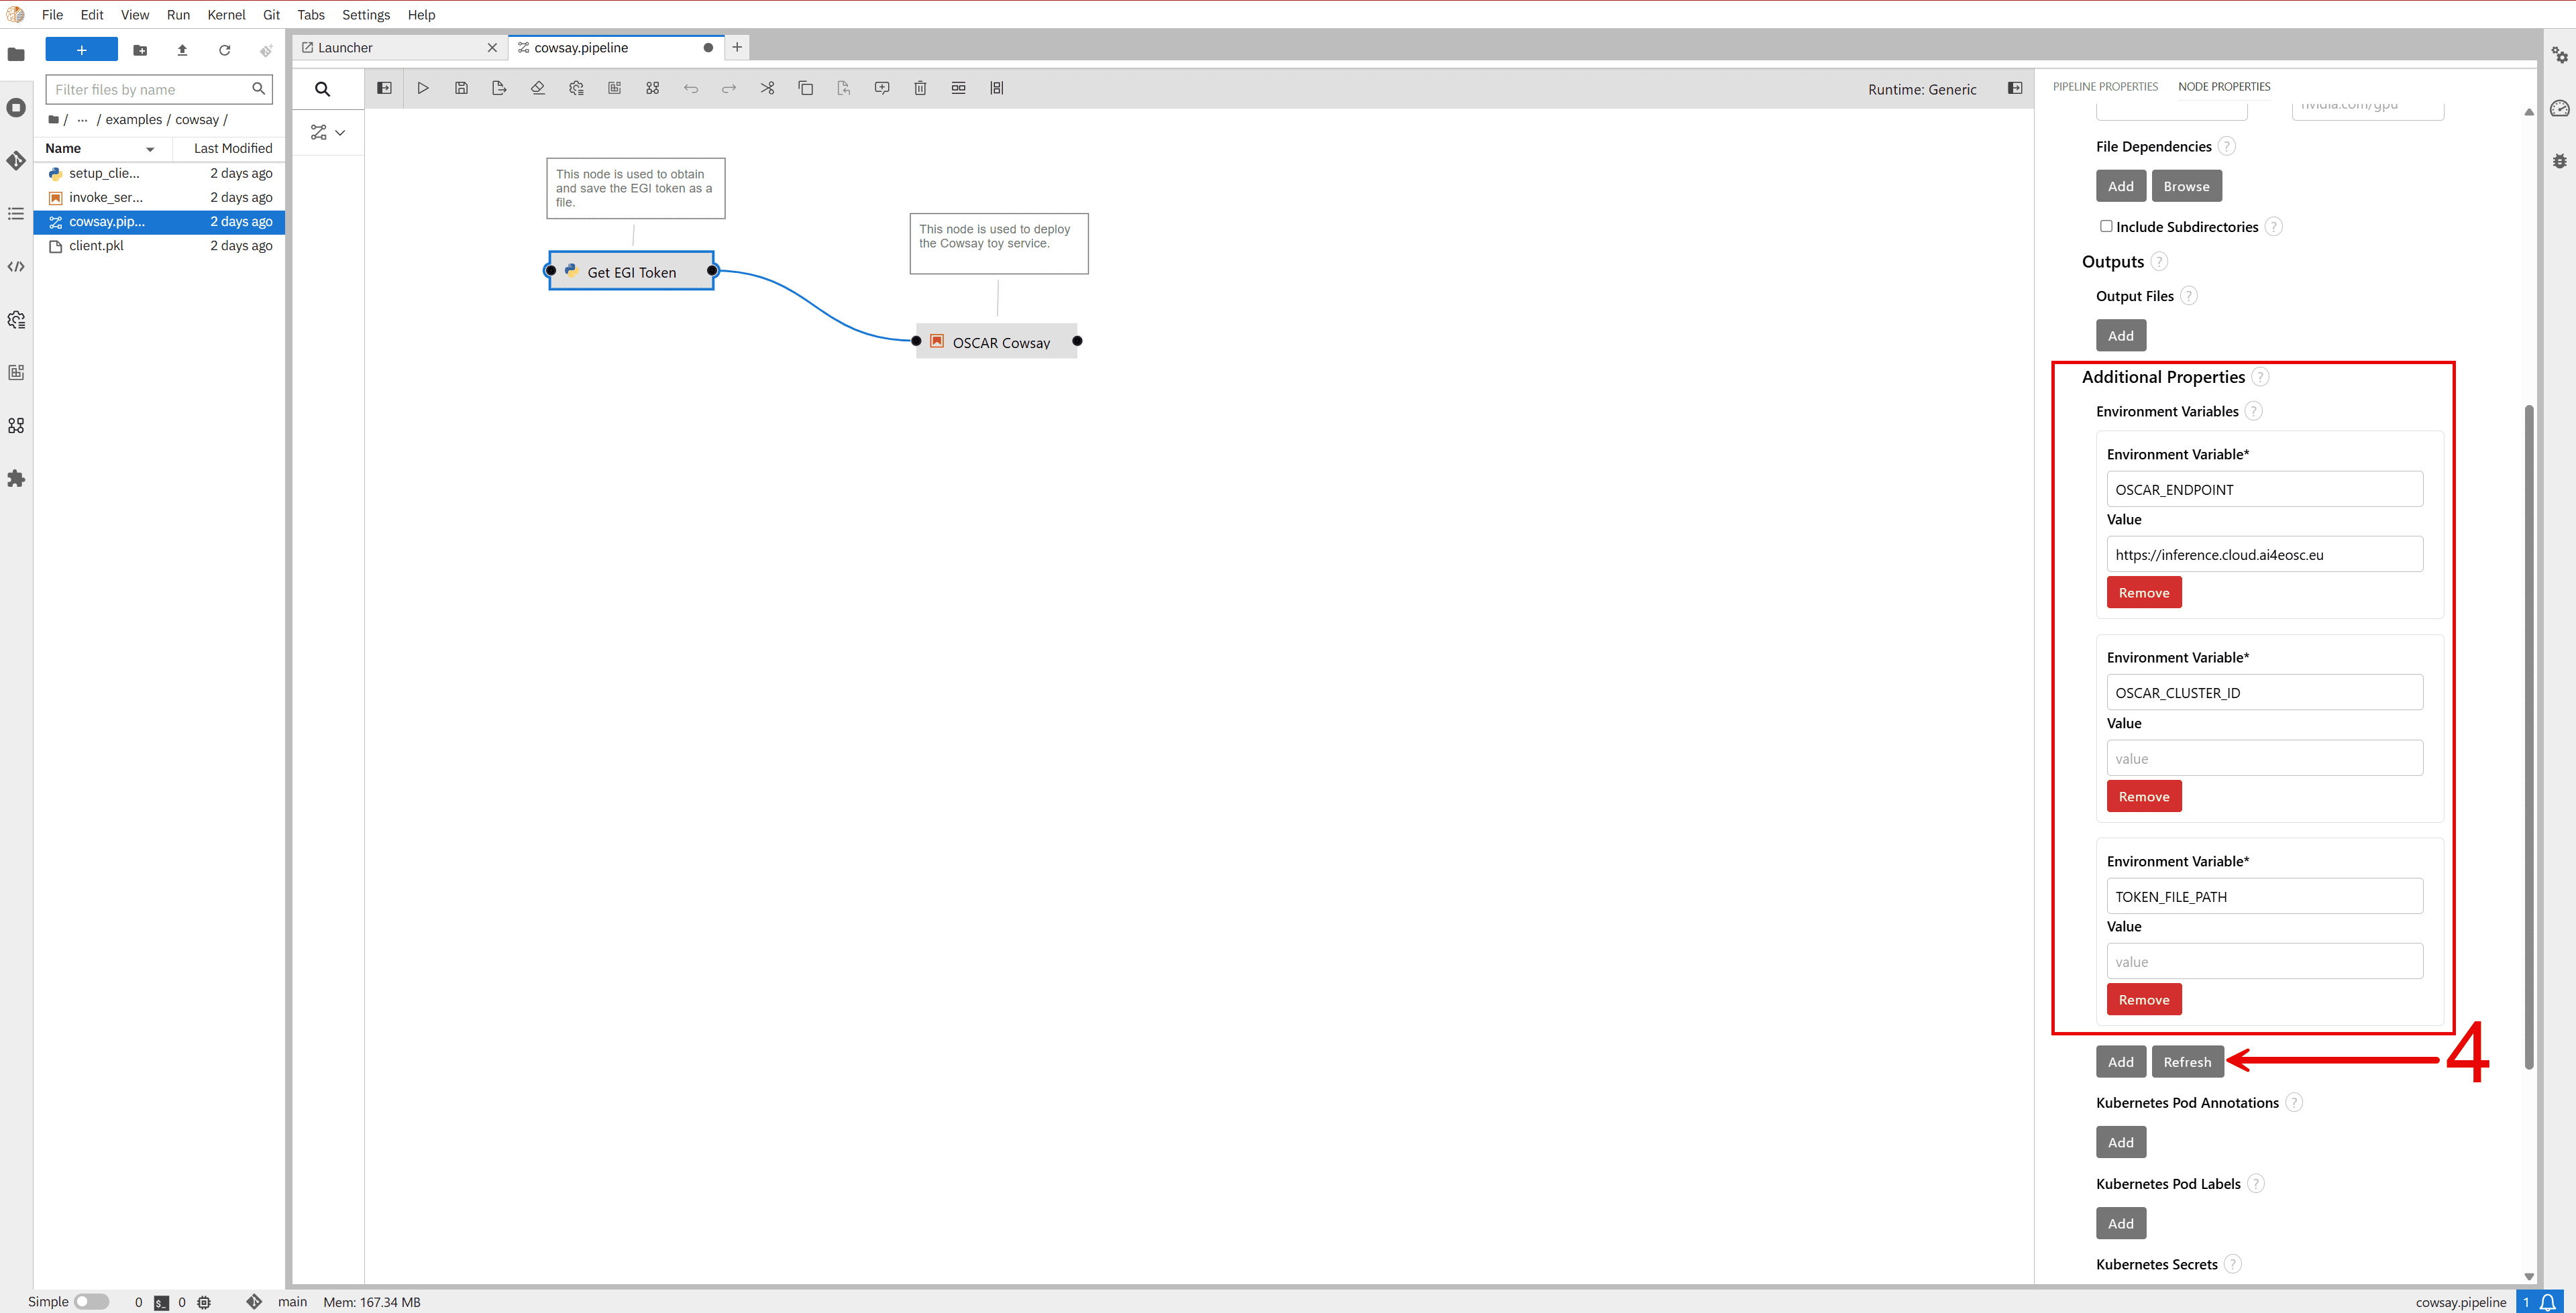
In the Environment Variables section, click the Refresh button. This will populate the variables:
OSCAR_CLUSTER_ID(optional)TOKEN_FILE_PATH
These variables are required to configure the client properly.
By default, if you are running in the EGI notebook environment, the token is automatically read from the EGI notebook environment, you need to generate a refresh token from the EGI token page:
/var/run/secrets/egi.eu/access_token
and no further configuration of the token is required. The TOKEN_FILE_PATH variable is only relevant if you are running Elyra in your own environment. In that case, you will need to generate a refresh token manually from the EGI token page and use it to configure the client, which will allow you to interact with OSCAR services.
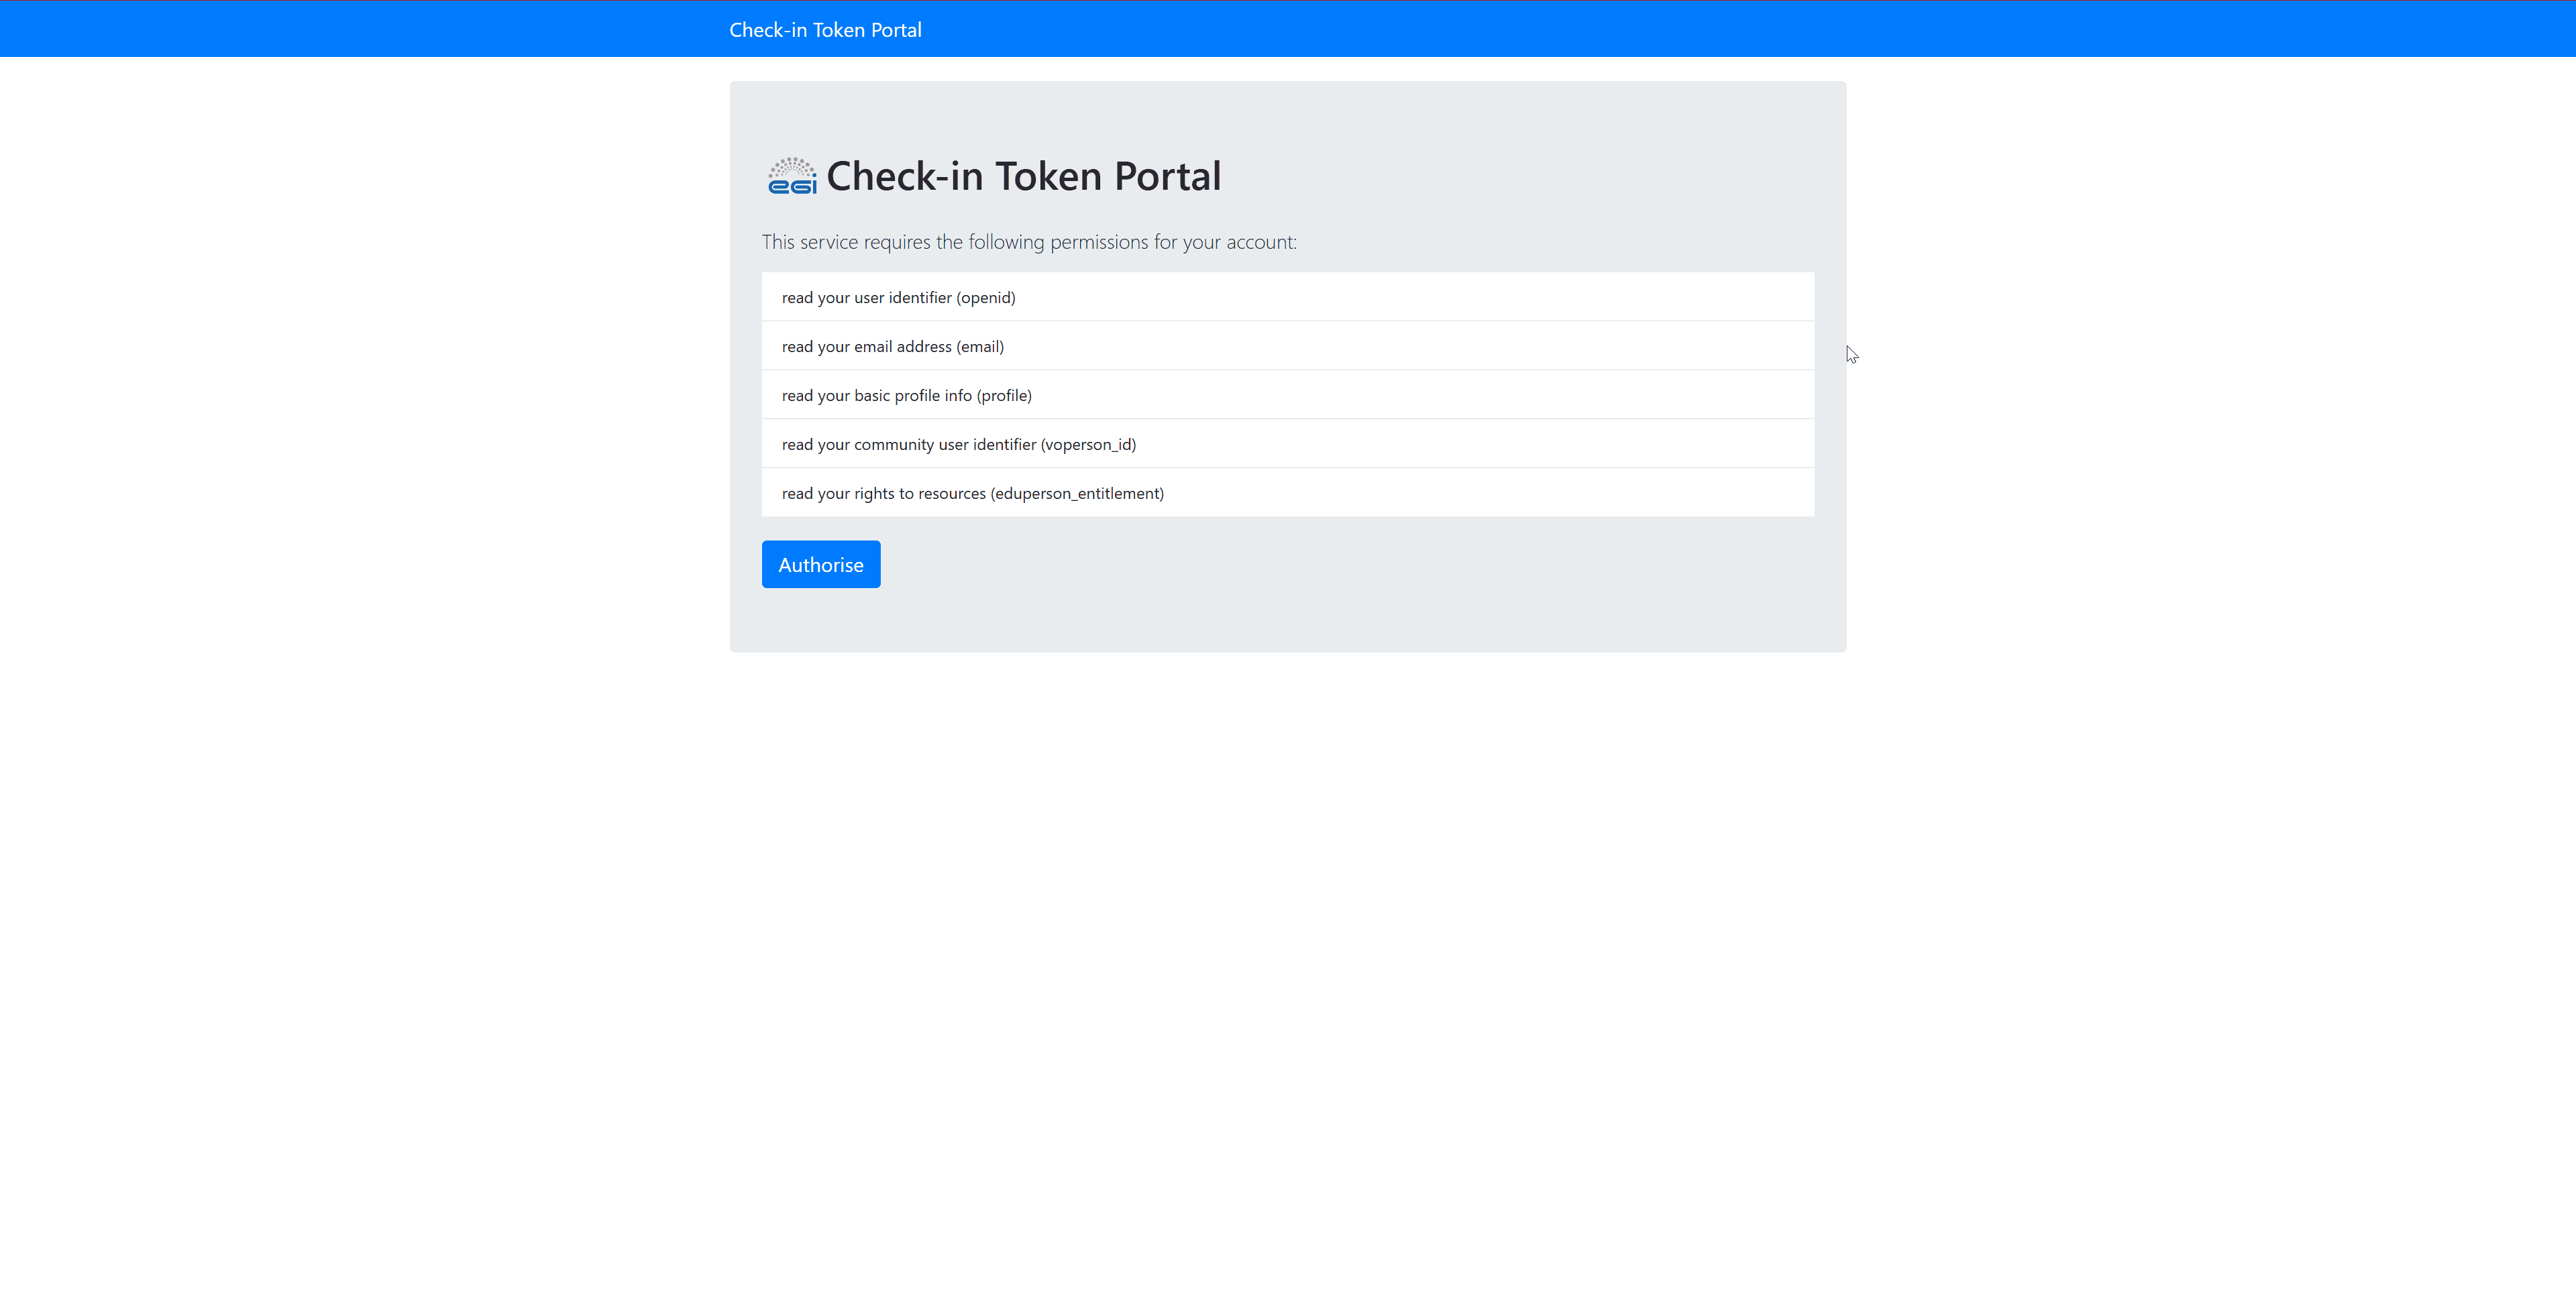
Follow these steps to generate a refresh token:
Authenticate on the EGI portal.
Click the button to create a refresh token.
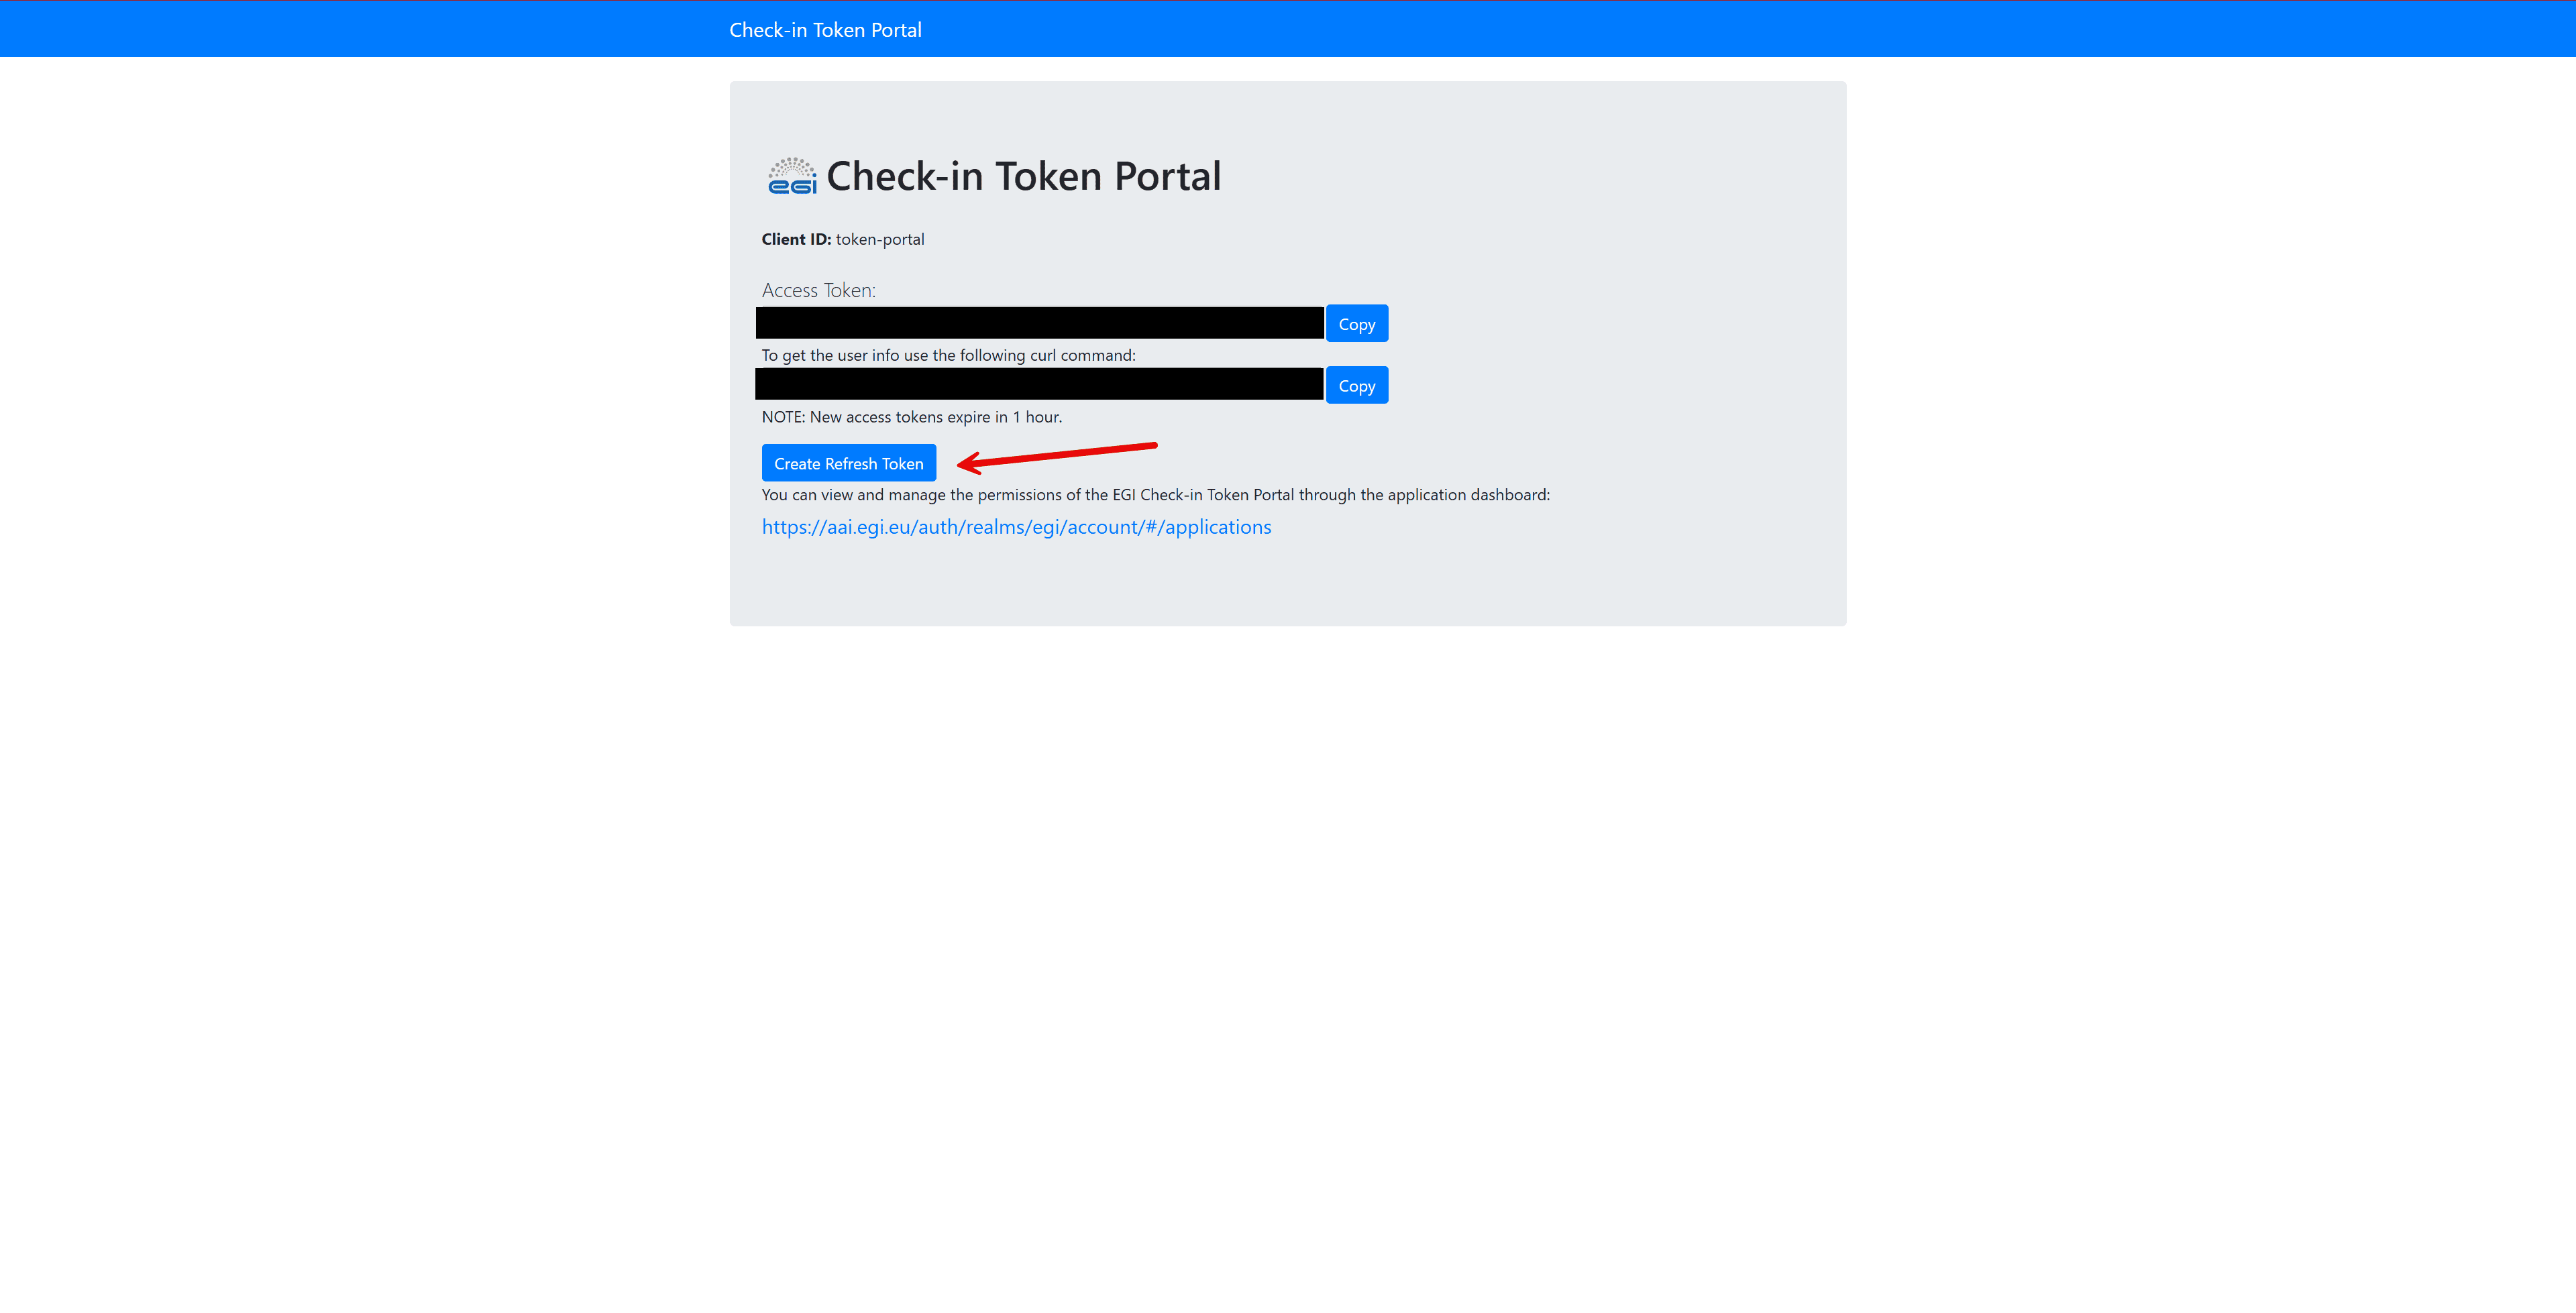
Copy the generated refresh token.
Note: providing a token file path is optional, as the setup client node (also called EGI Token node) can extract the token automatically from the Jupyter notebook environment. Use the token file path only if you explicitly generated and want to provide a refresh token.
Once the client is set up, you can seamlessly integrate OSCAR nodes into your workflow.
2.3 Configuring the OSCAR Client
Before running any example, ensure your OSCAR client is properly configured. You may need to set environment variables such as:
Endpoint: The URL of the OSCAR inference service.
ID (optional): The identifier for the OSCAR service.
Token file path (optional): The location of the refresh token, if applicable.
Once configured, you can execute workflows and use OSCAR nodes within your pipeline.
2.4 Creating Your Own Pipeline
Before deploying or configuring a provided pipeline, you may want to create your own from scratch. Elyra makes this process simple through its visual pipeline editor.
Follow these steps to create a pipeline and add nodes:
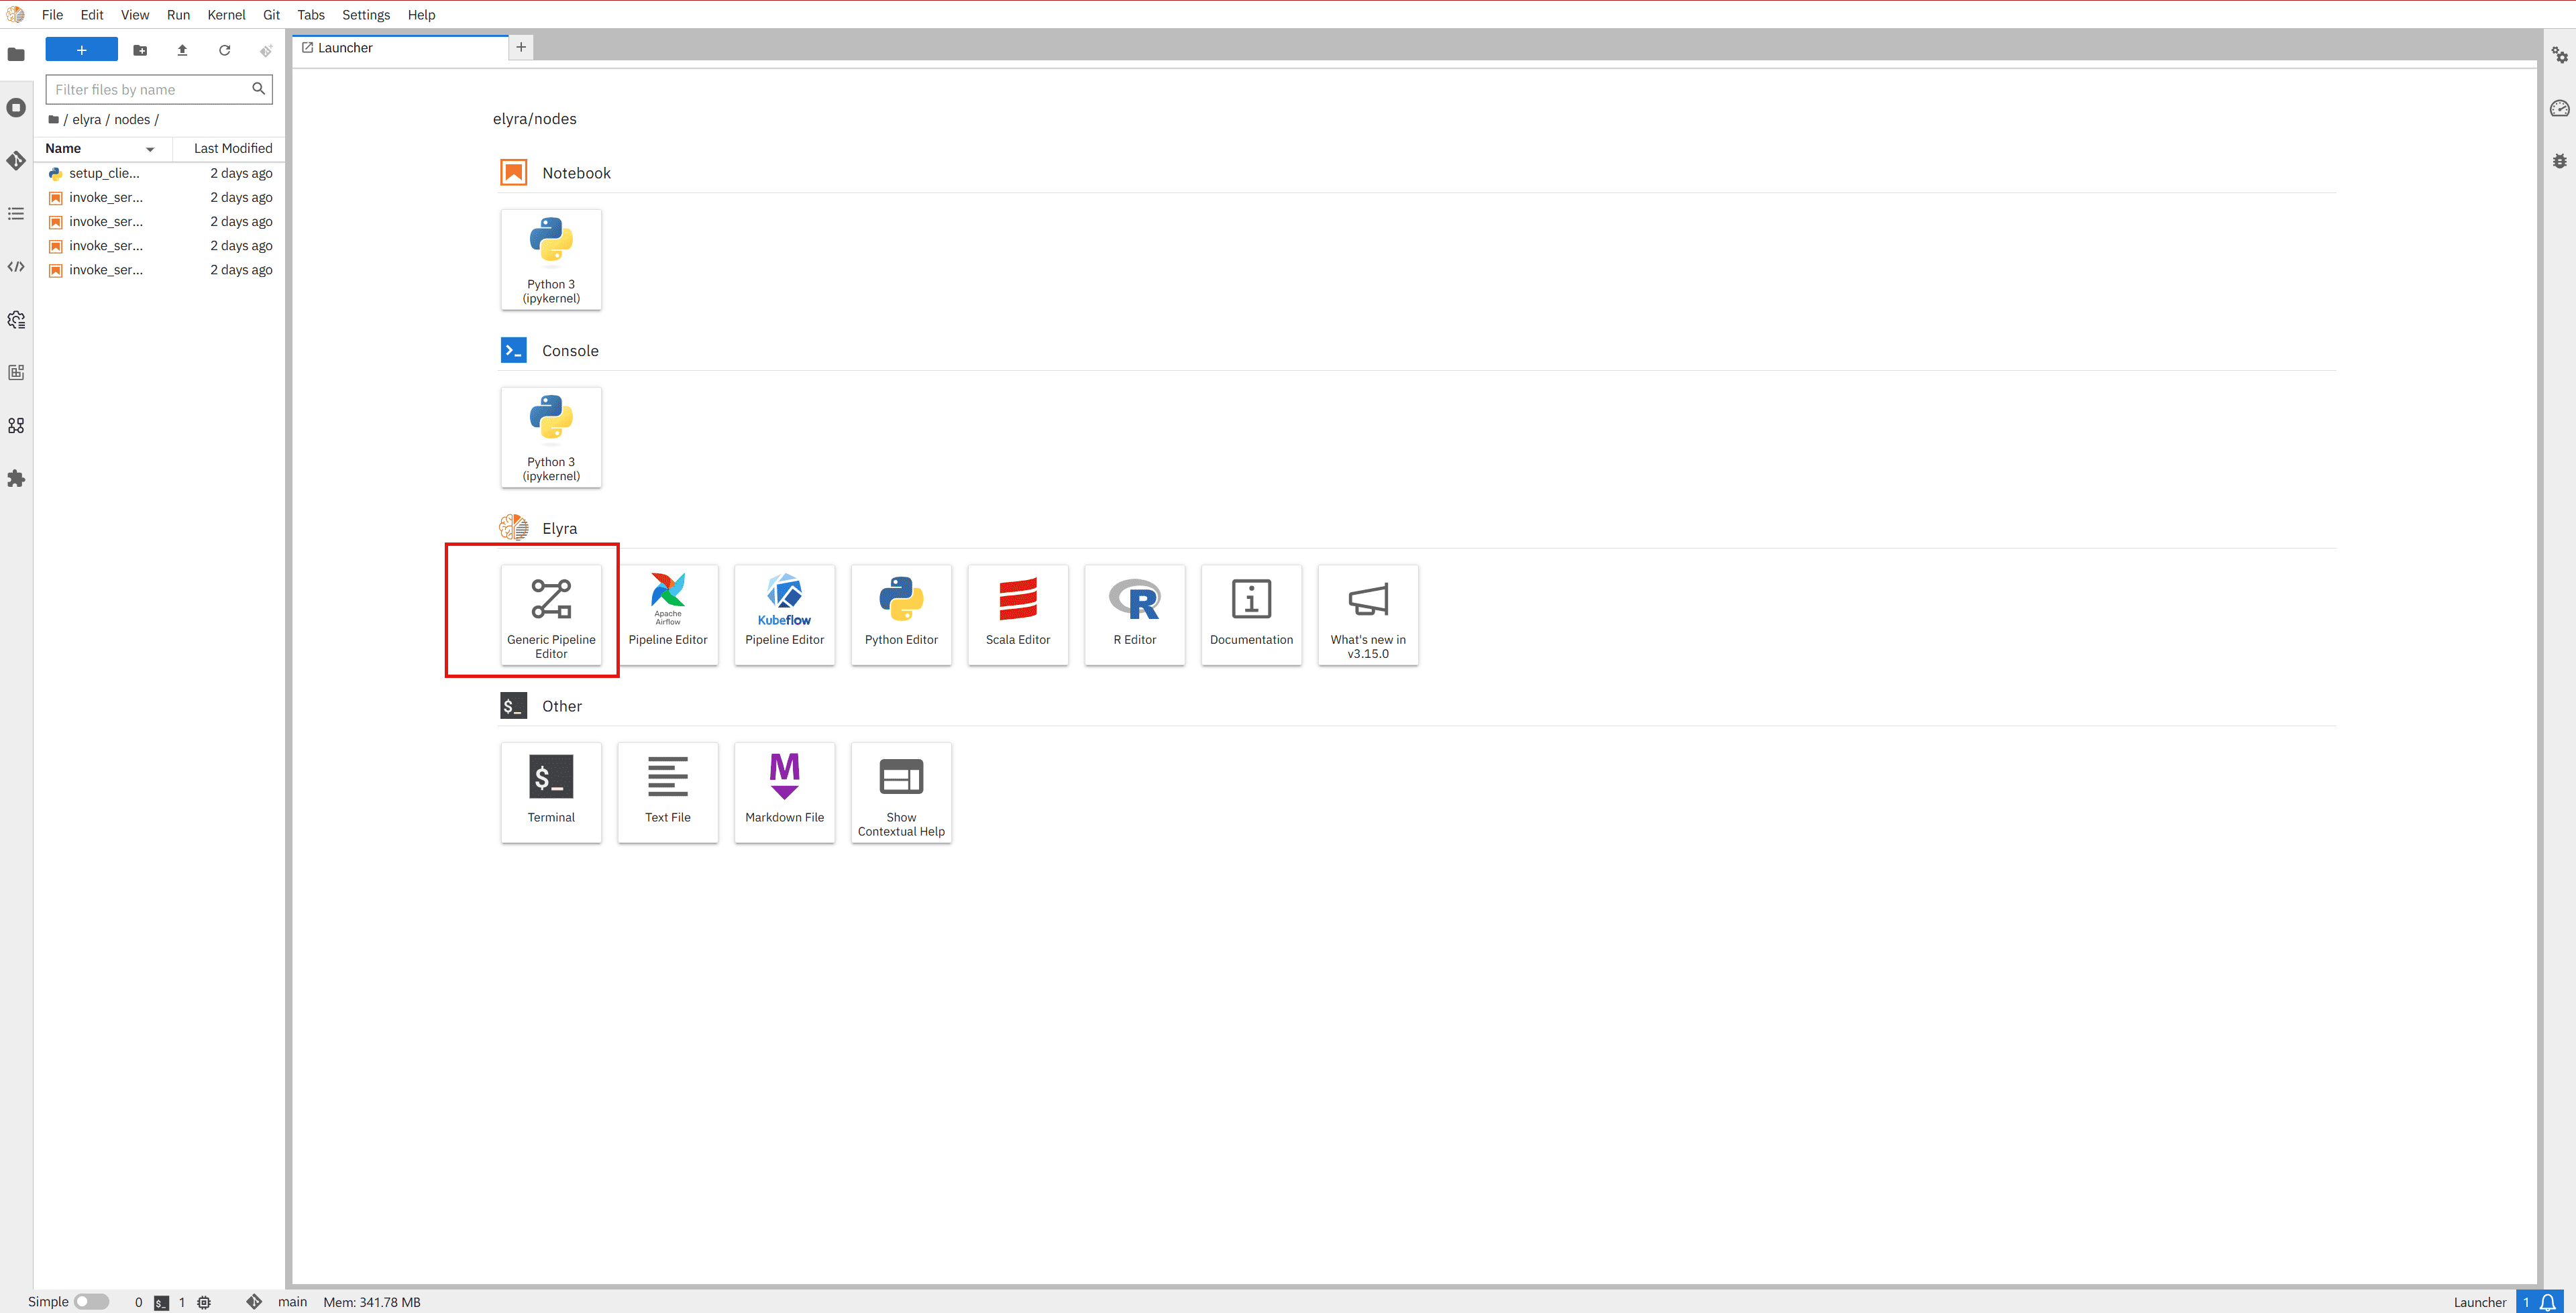
From the JupyterLab Launcher, click on the Generic Pipeline Editor icon under the Elyra section. This will open an empty canvas where you can build your workflow.
In the side panel, navigate to the File Browser and locate the notebooks (
.ipynb) or scripts (.py) you want to include as nodes in your pipeline. The provided example nodes can be found in the repository under the folder:/elyra/nodes/
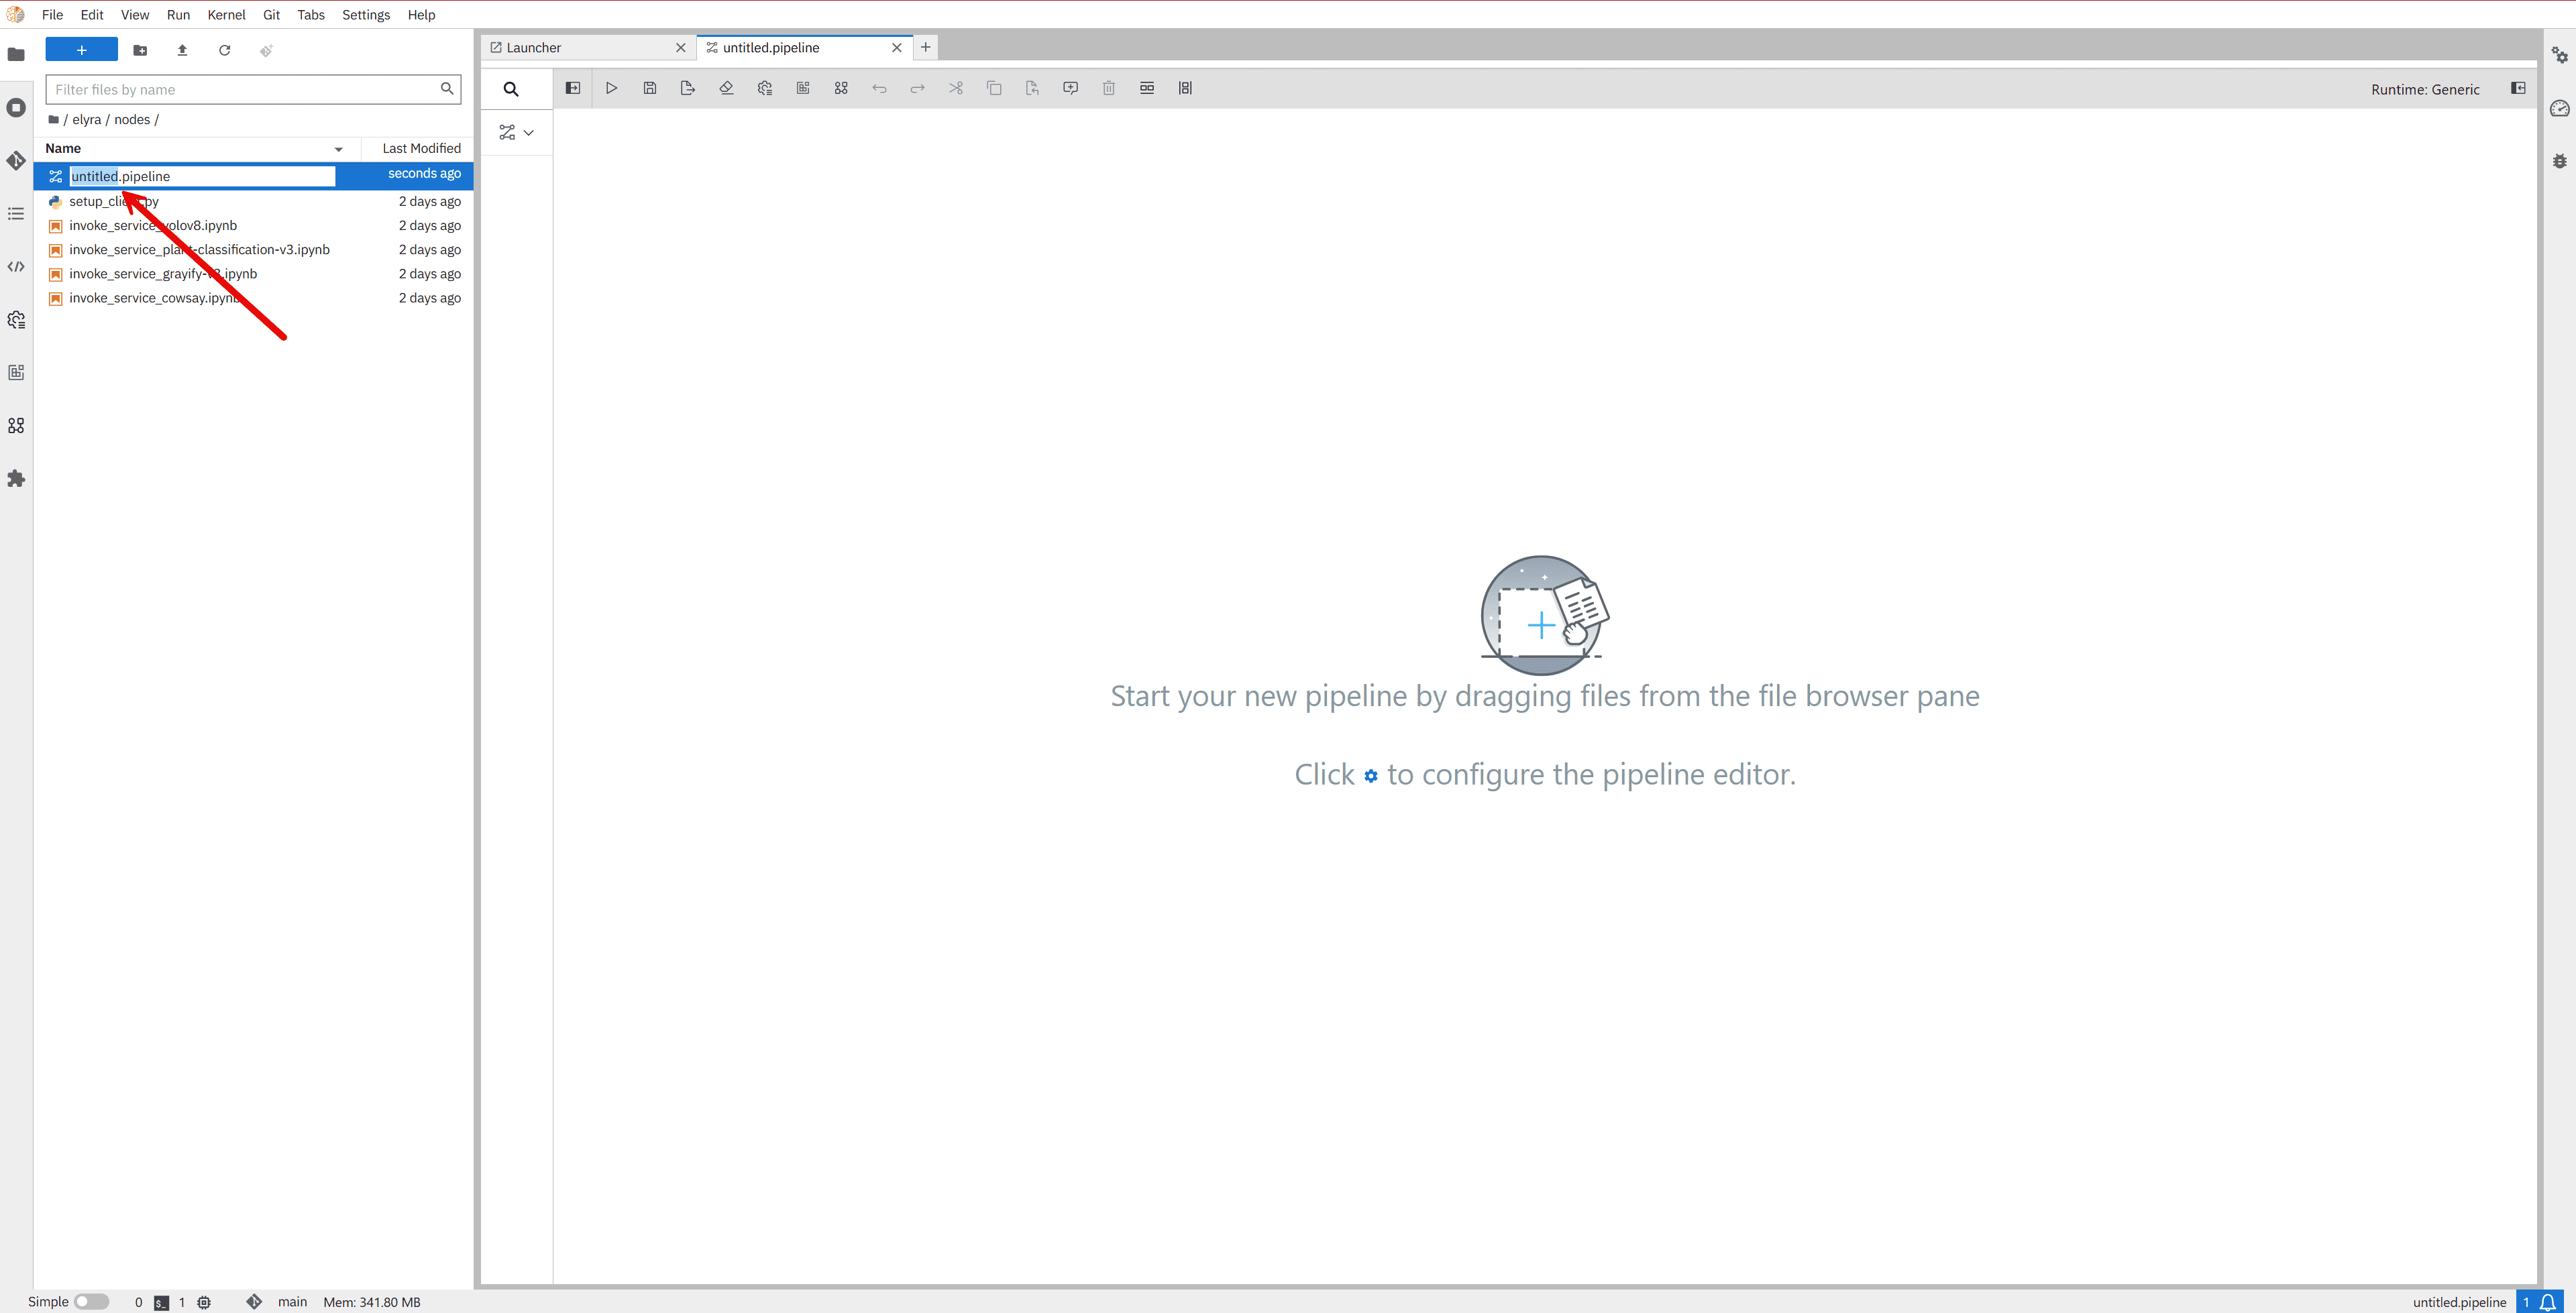
Drag and drop each file onto the canvas. Each file becomes a node in the pipeline.
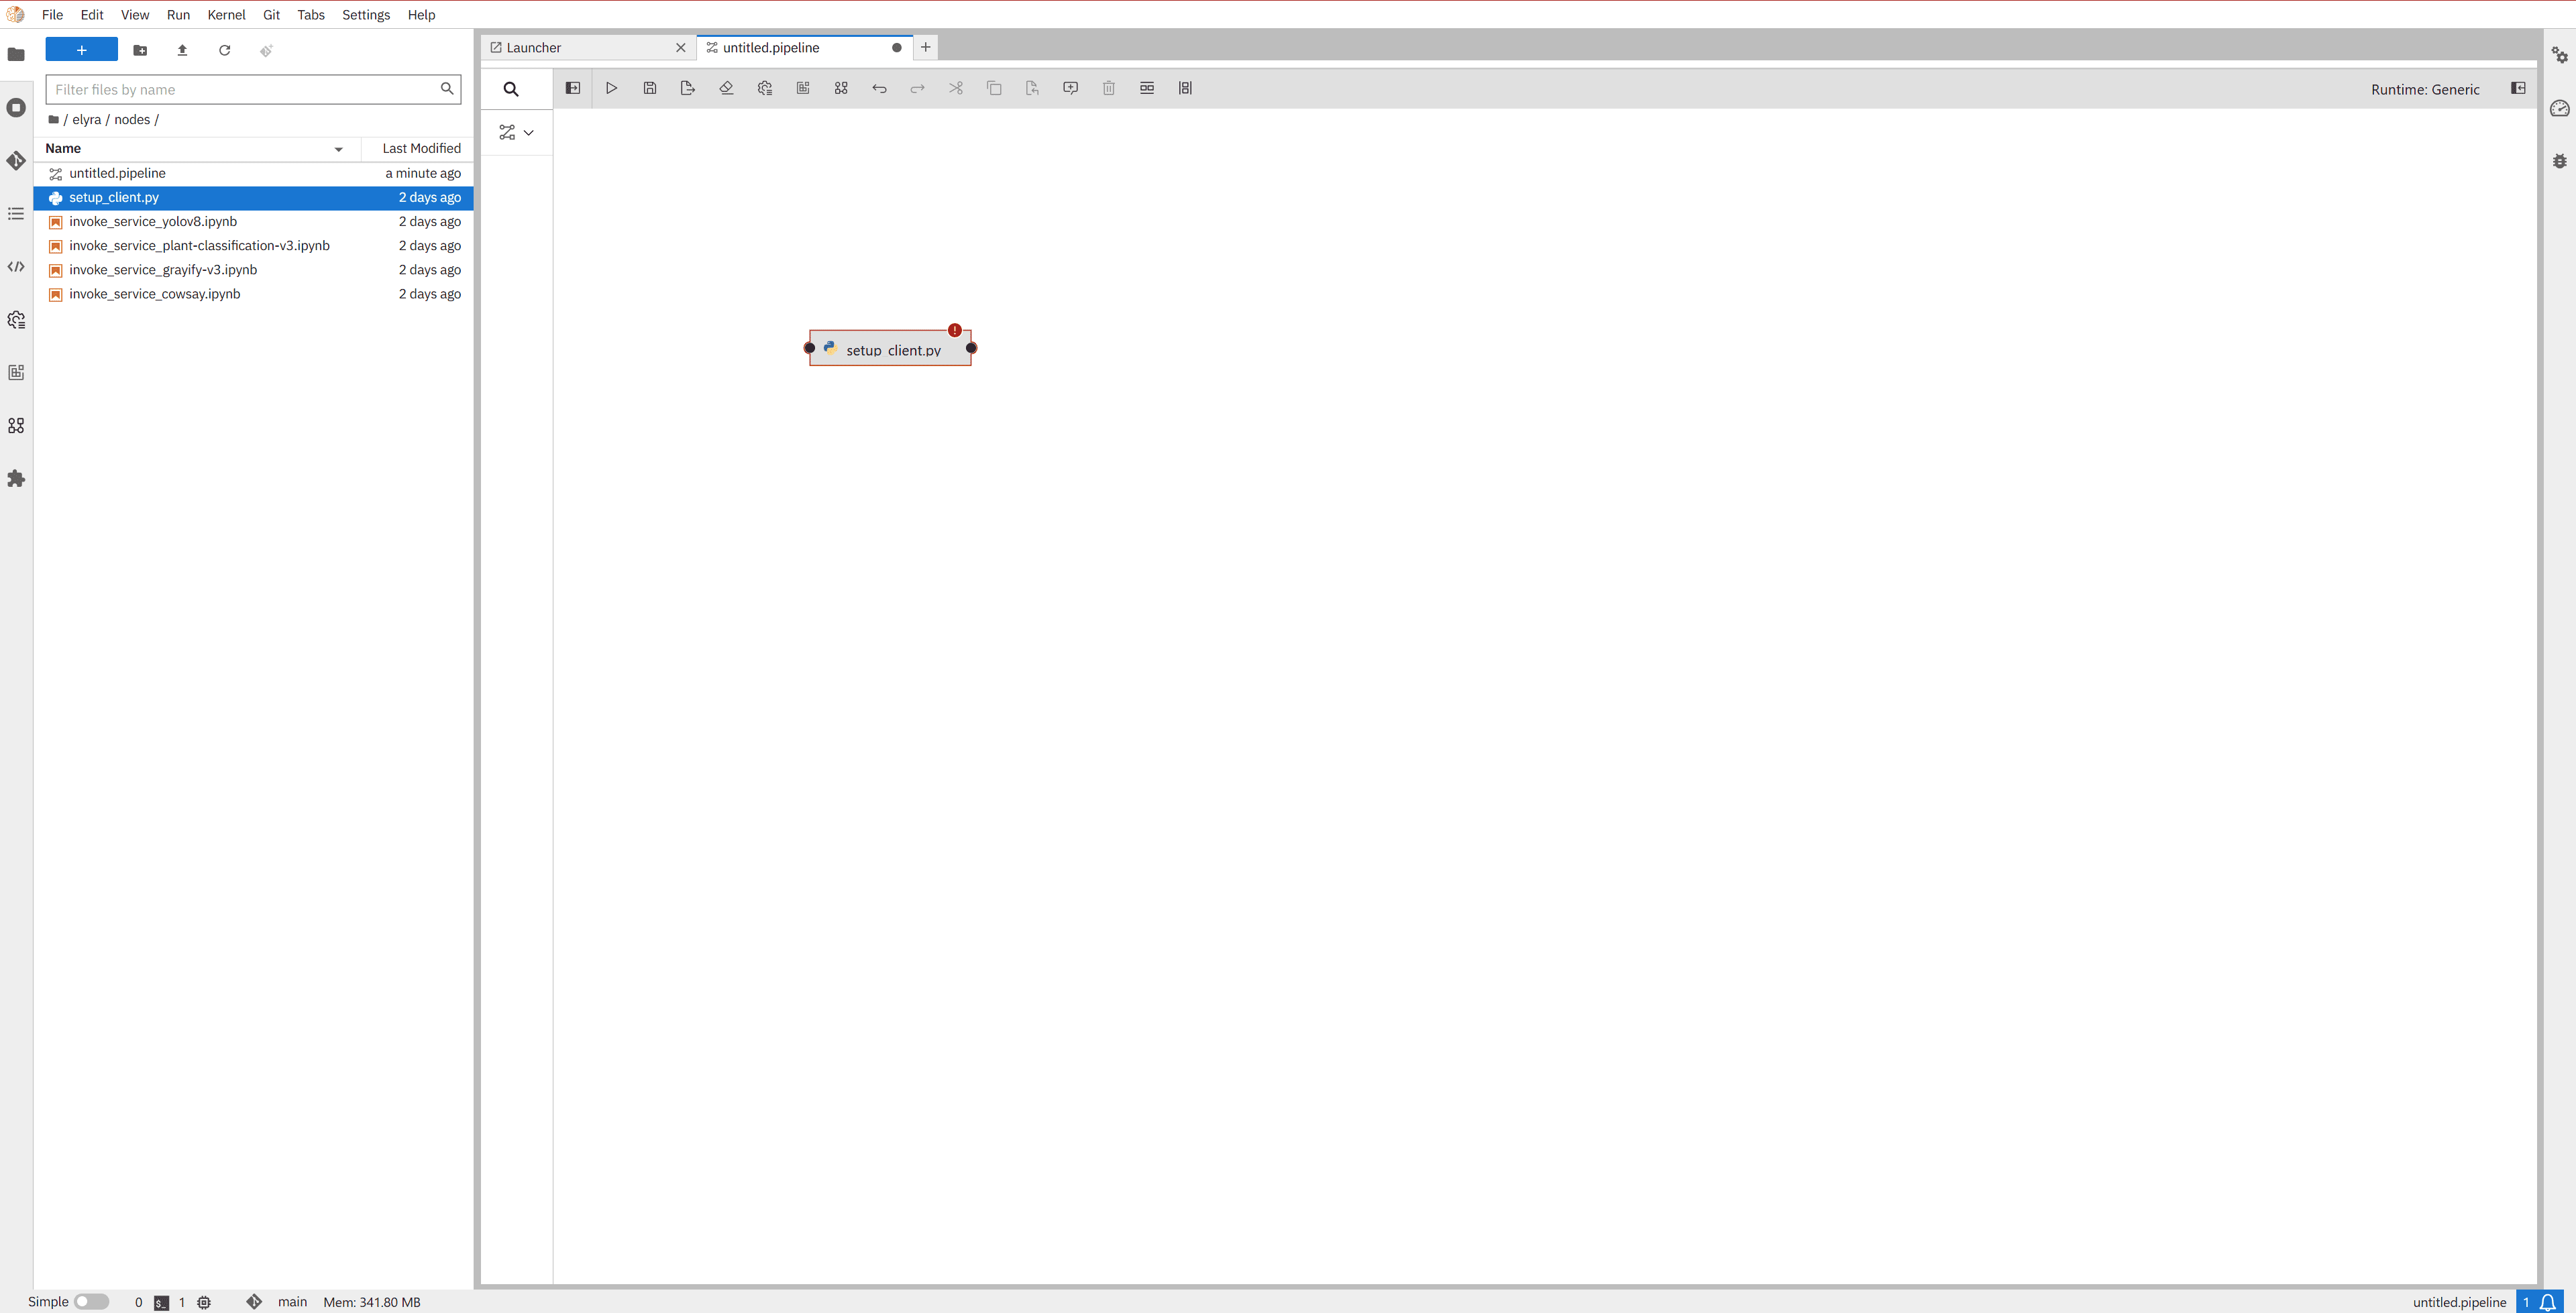
Connect the nodes by dragging a line from the output of one node to the input of the next, defining the execution order.
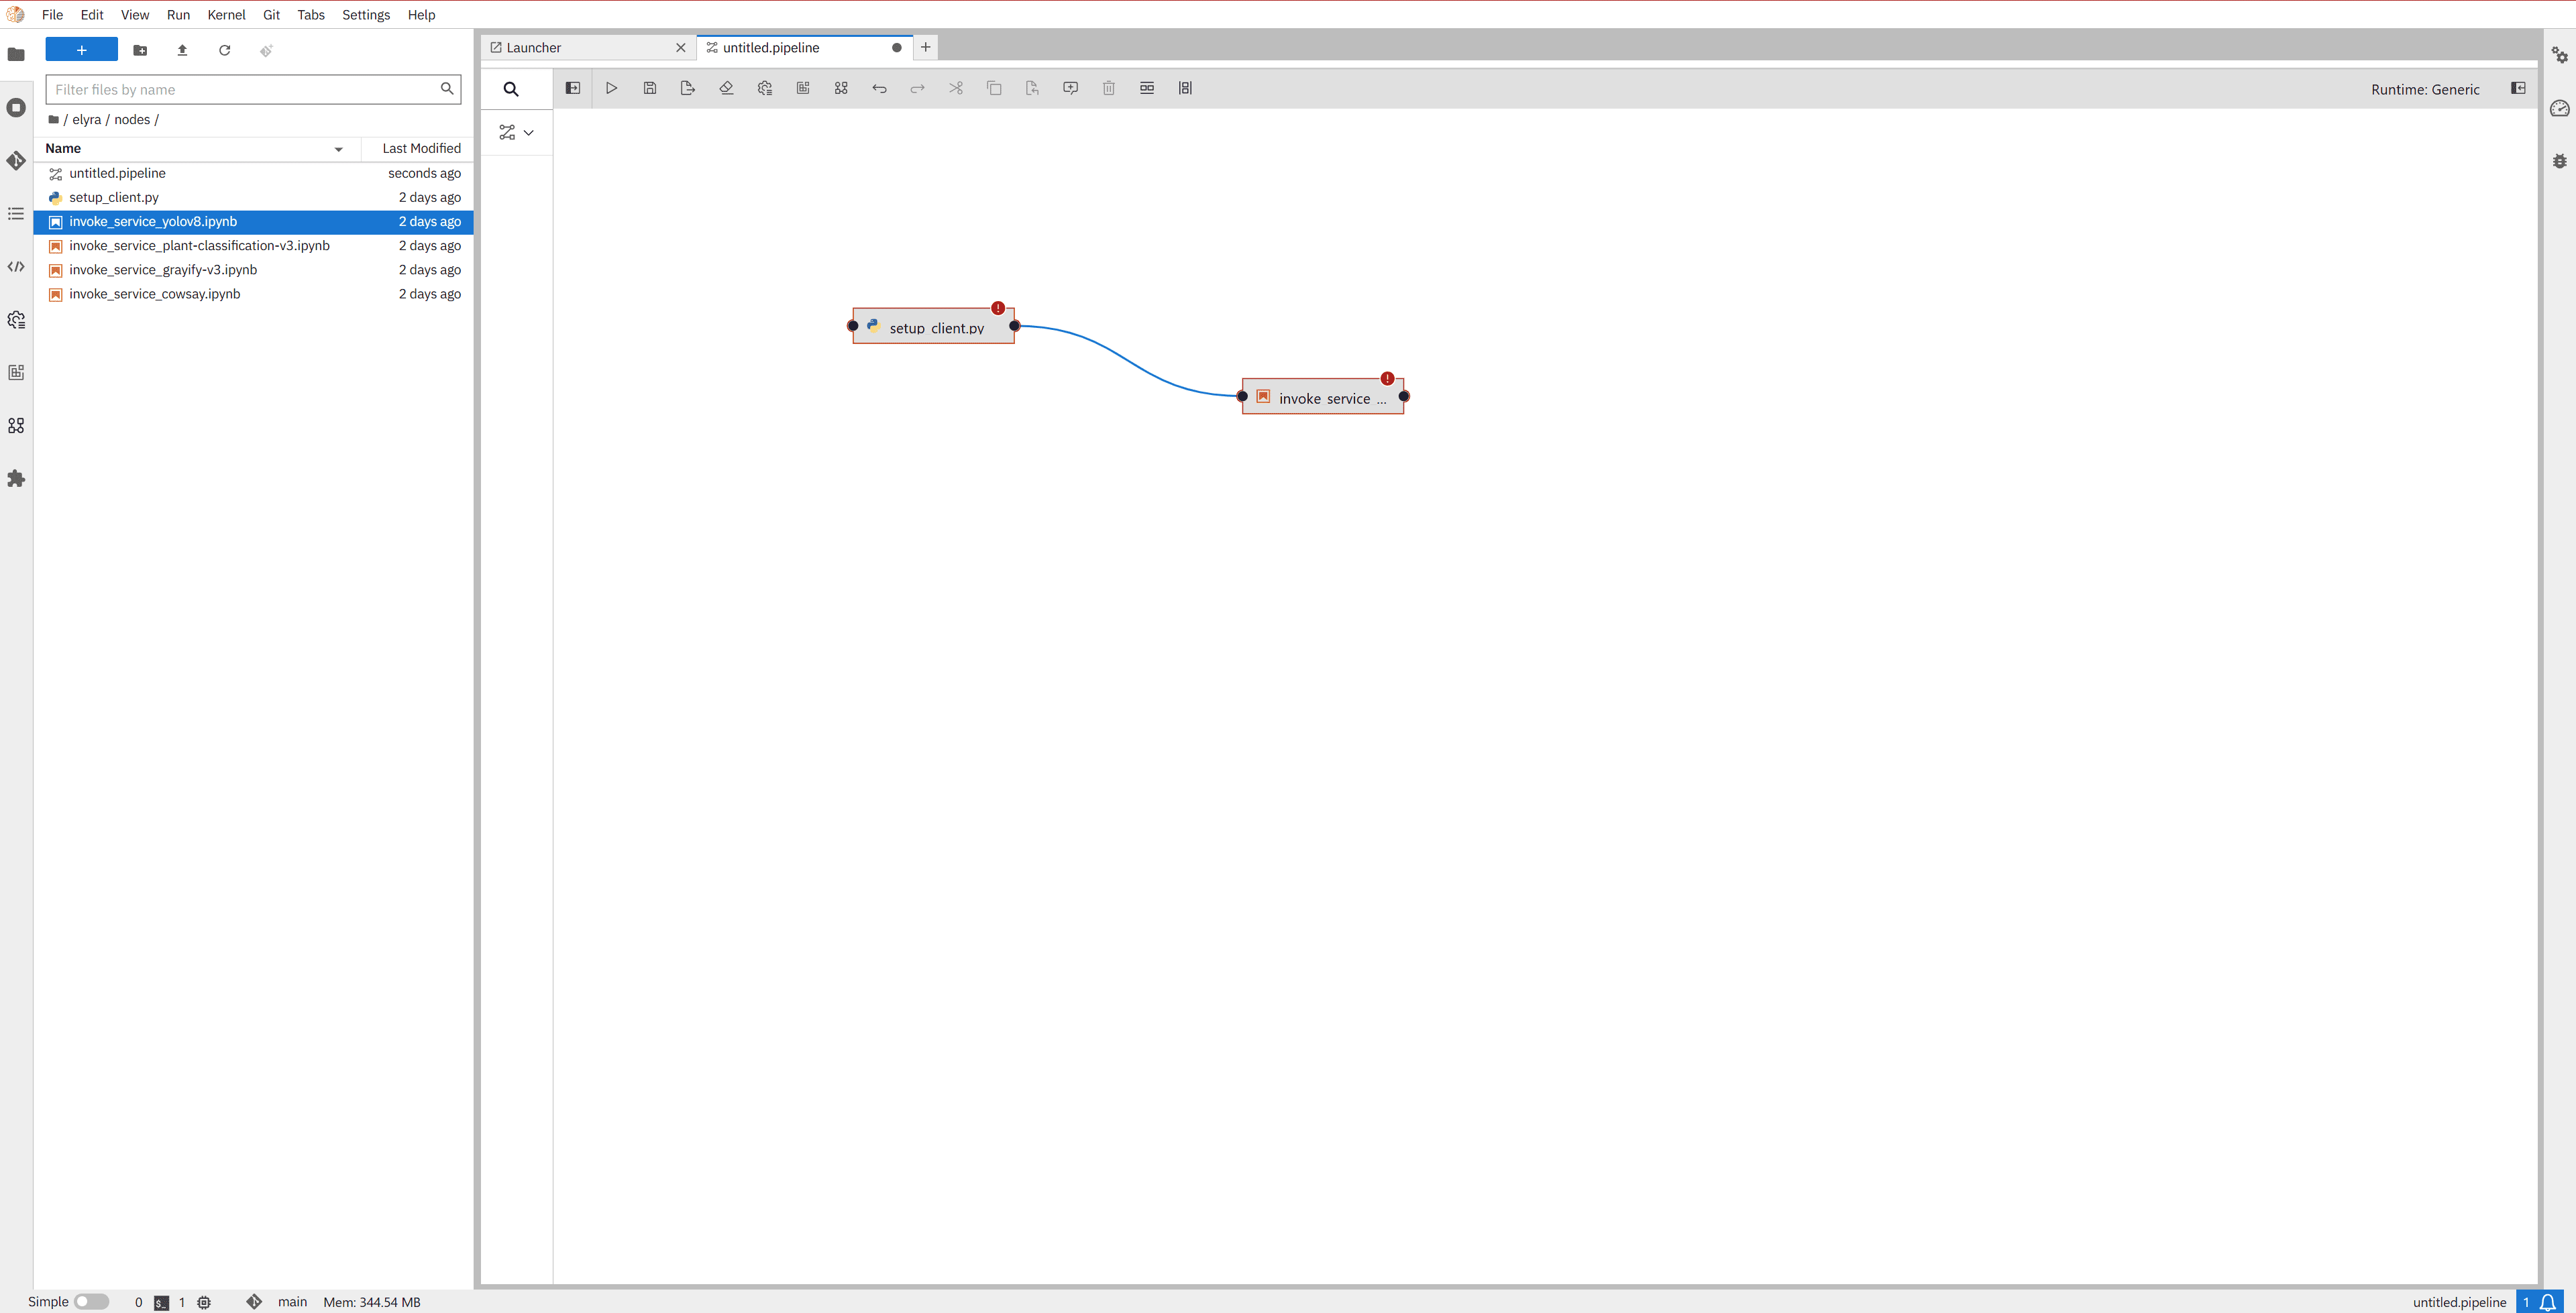
To remove the error shown in the nodes (“is a required property”, marked in red with an exclamation icon), simply follow Step 0 described in section 2.2 and assign a runtime image to each node.
Once your pipeline is built, you can save it (e.g., in the examples folder) and proceed to the next section, where we explain in detail how to run and configure the provided cowsay.pipeline example.
3.1 Running the Cowsay Example
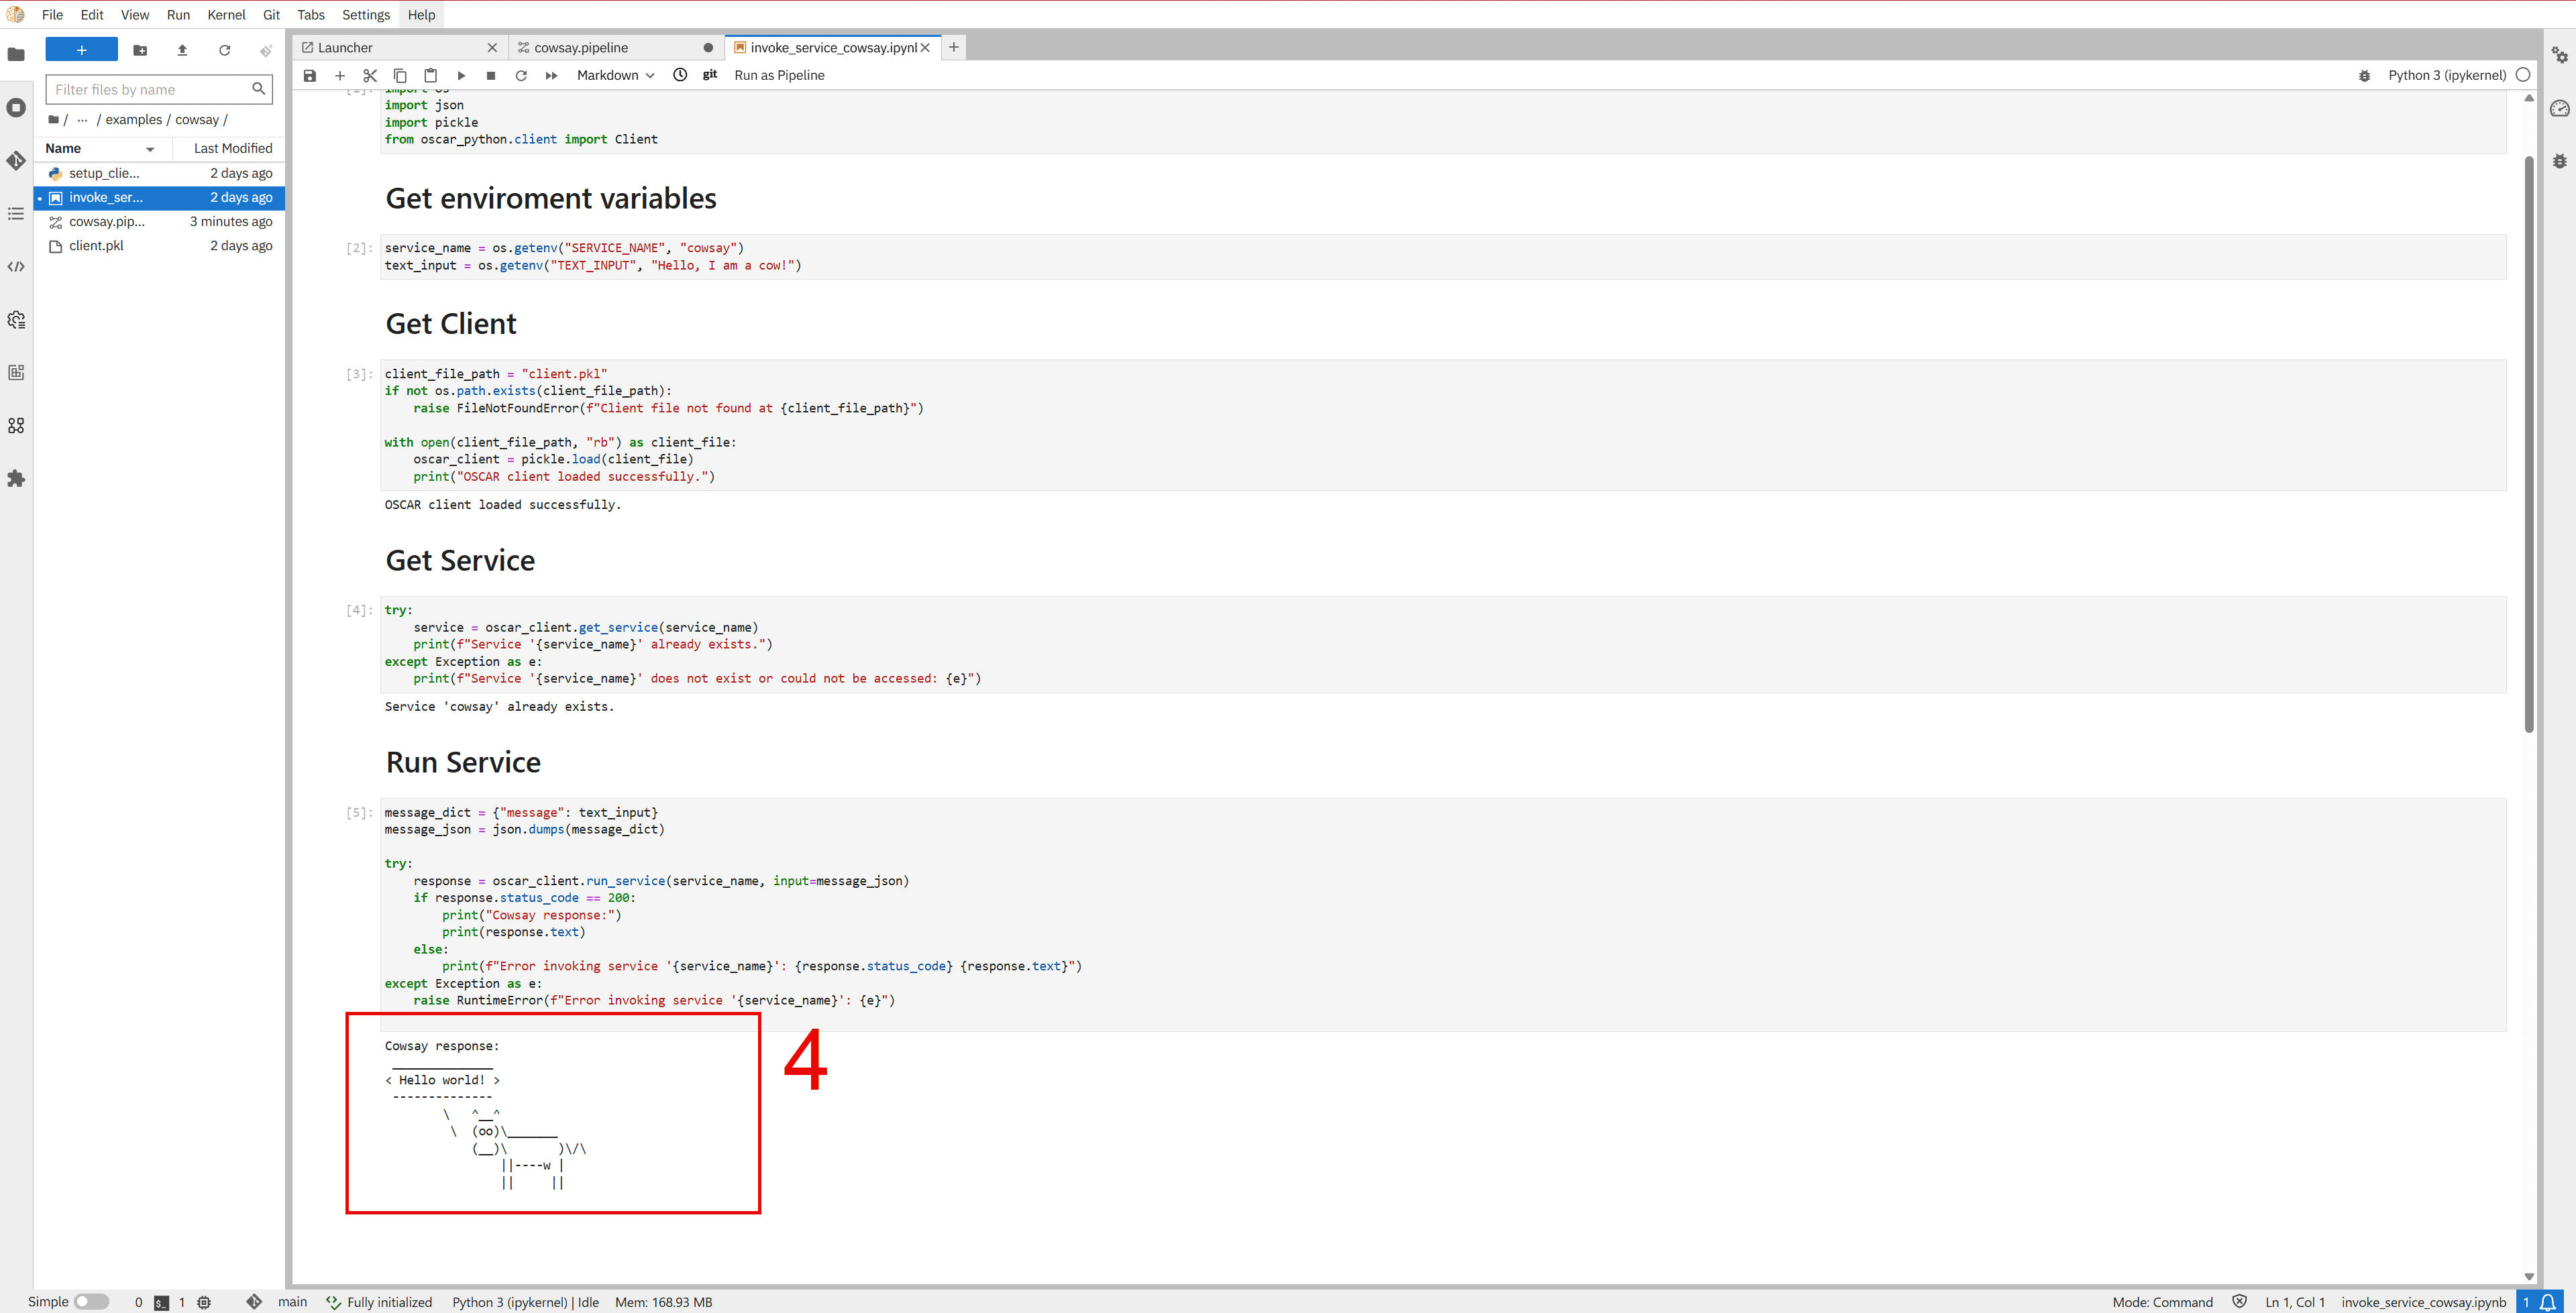
Now let’s get our cow to talk! Follow these steps to set up the workflow in Elyra:
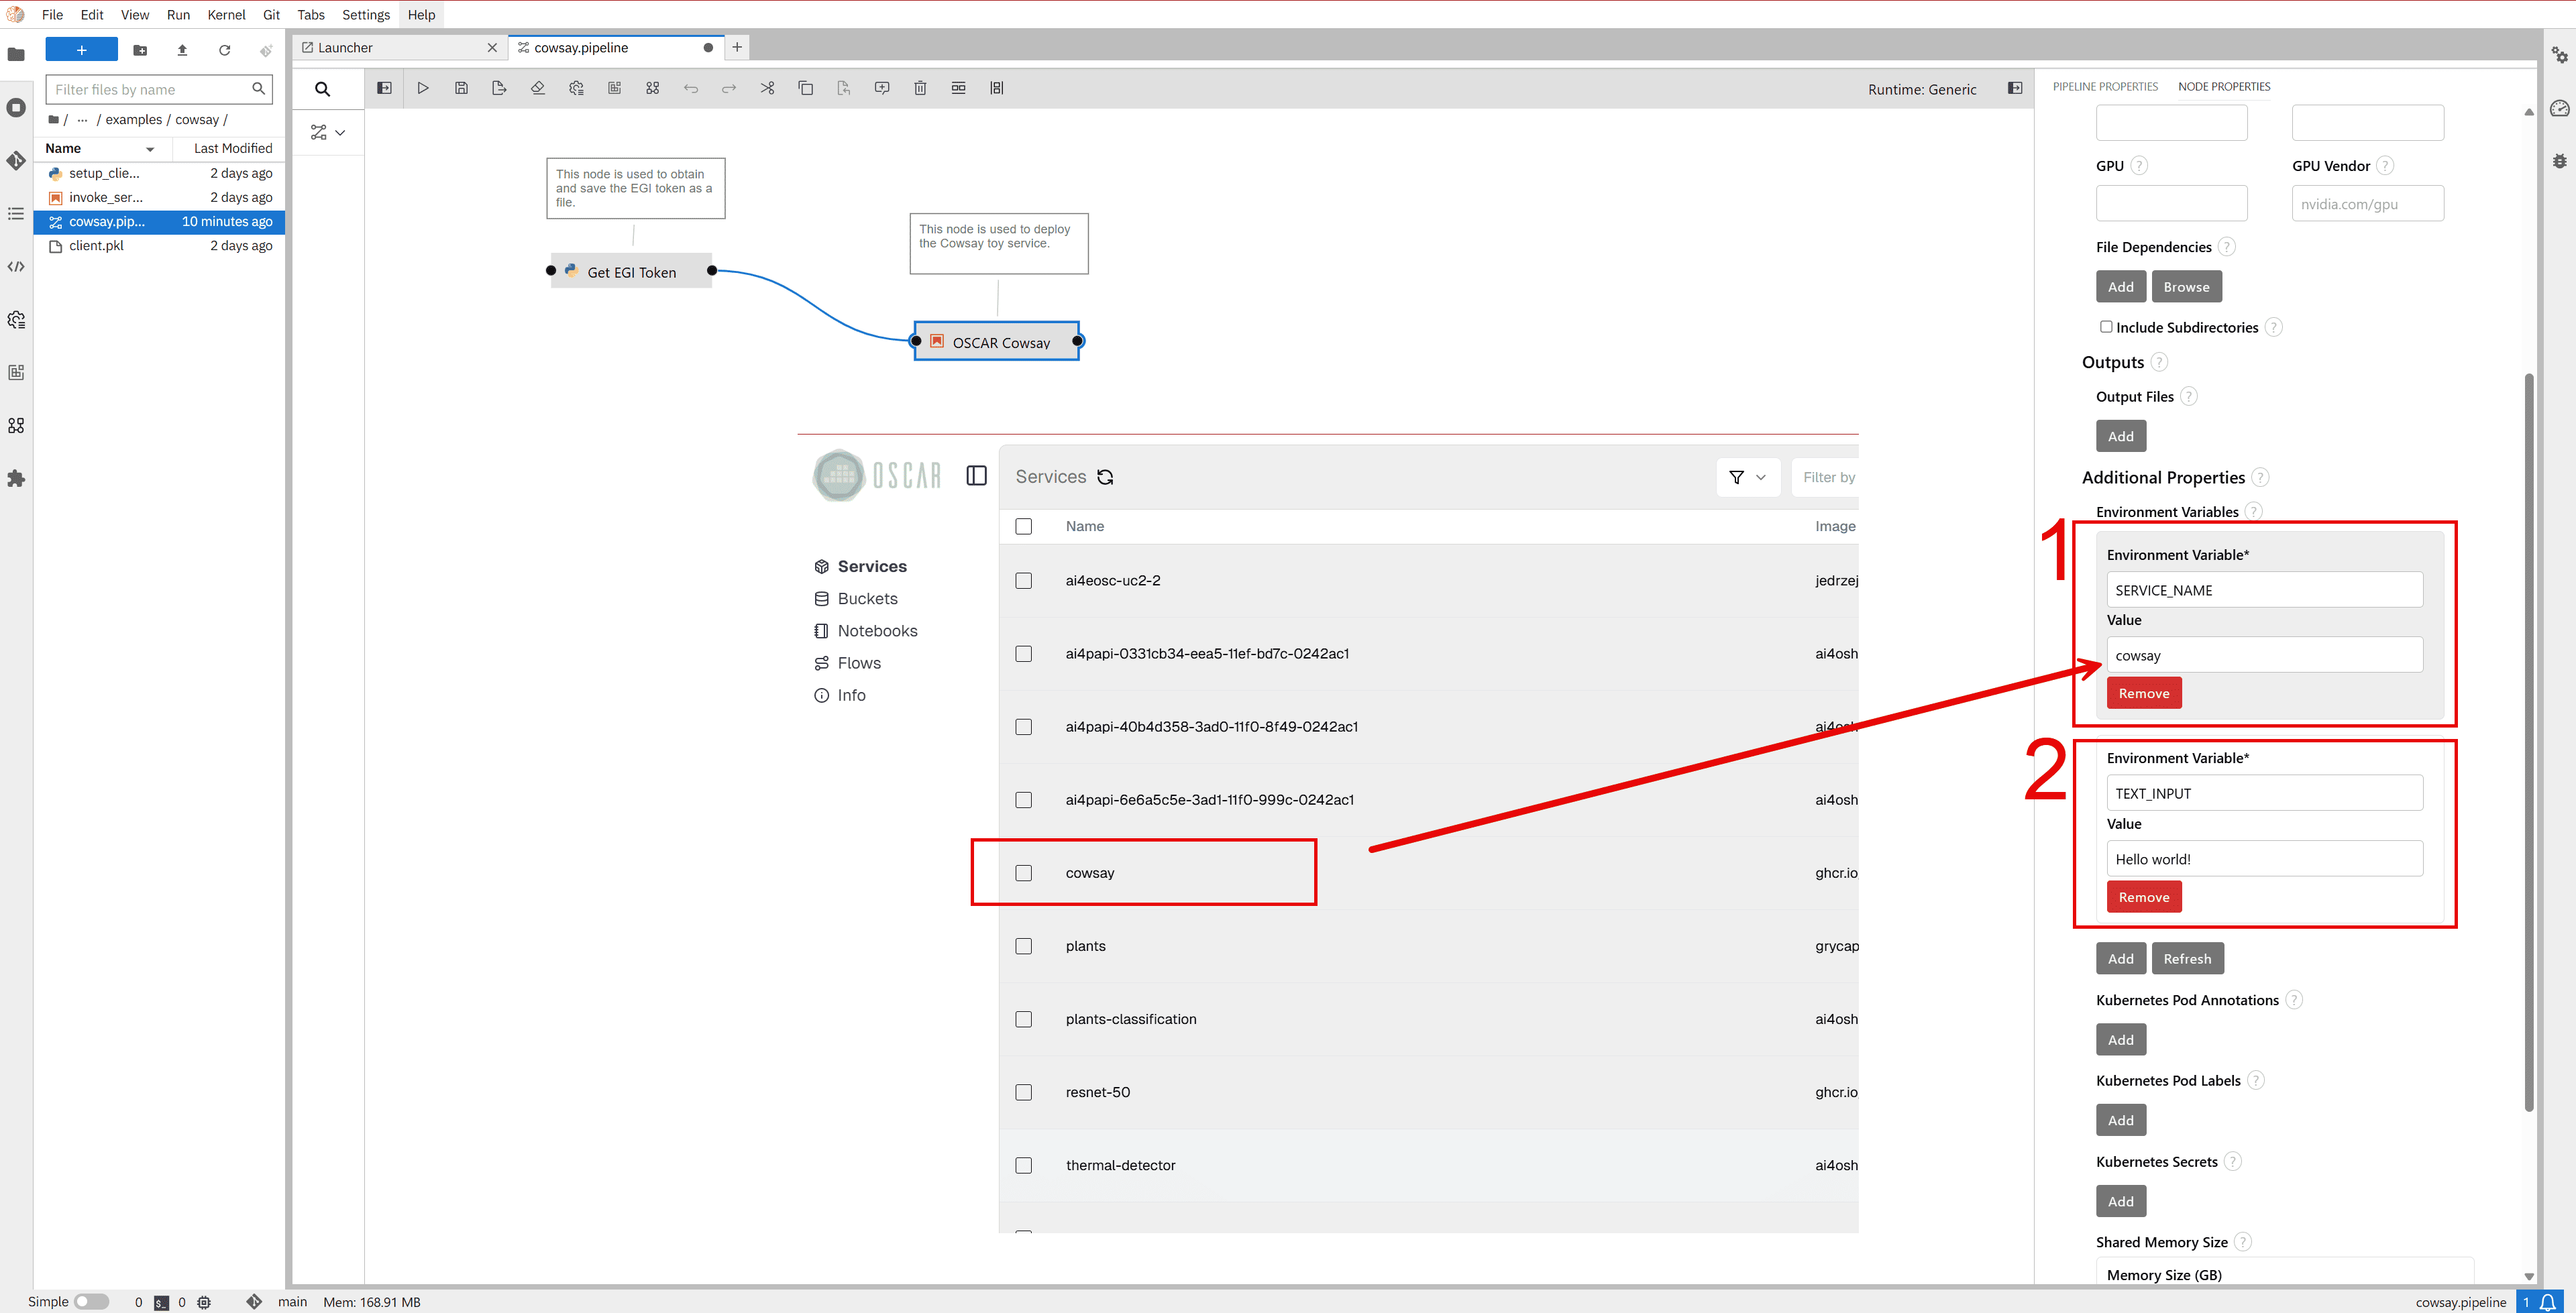
In the Environment Variables of the cowsay service node, set the name of the service assigned to the OSCAR cluster.
Specify the text you want the cow to say (e.g.,
Hello world!) as an environment variable.
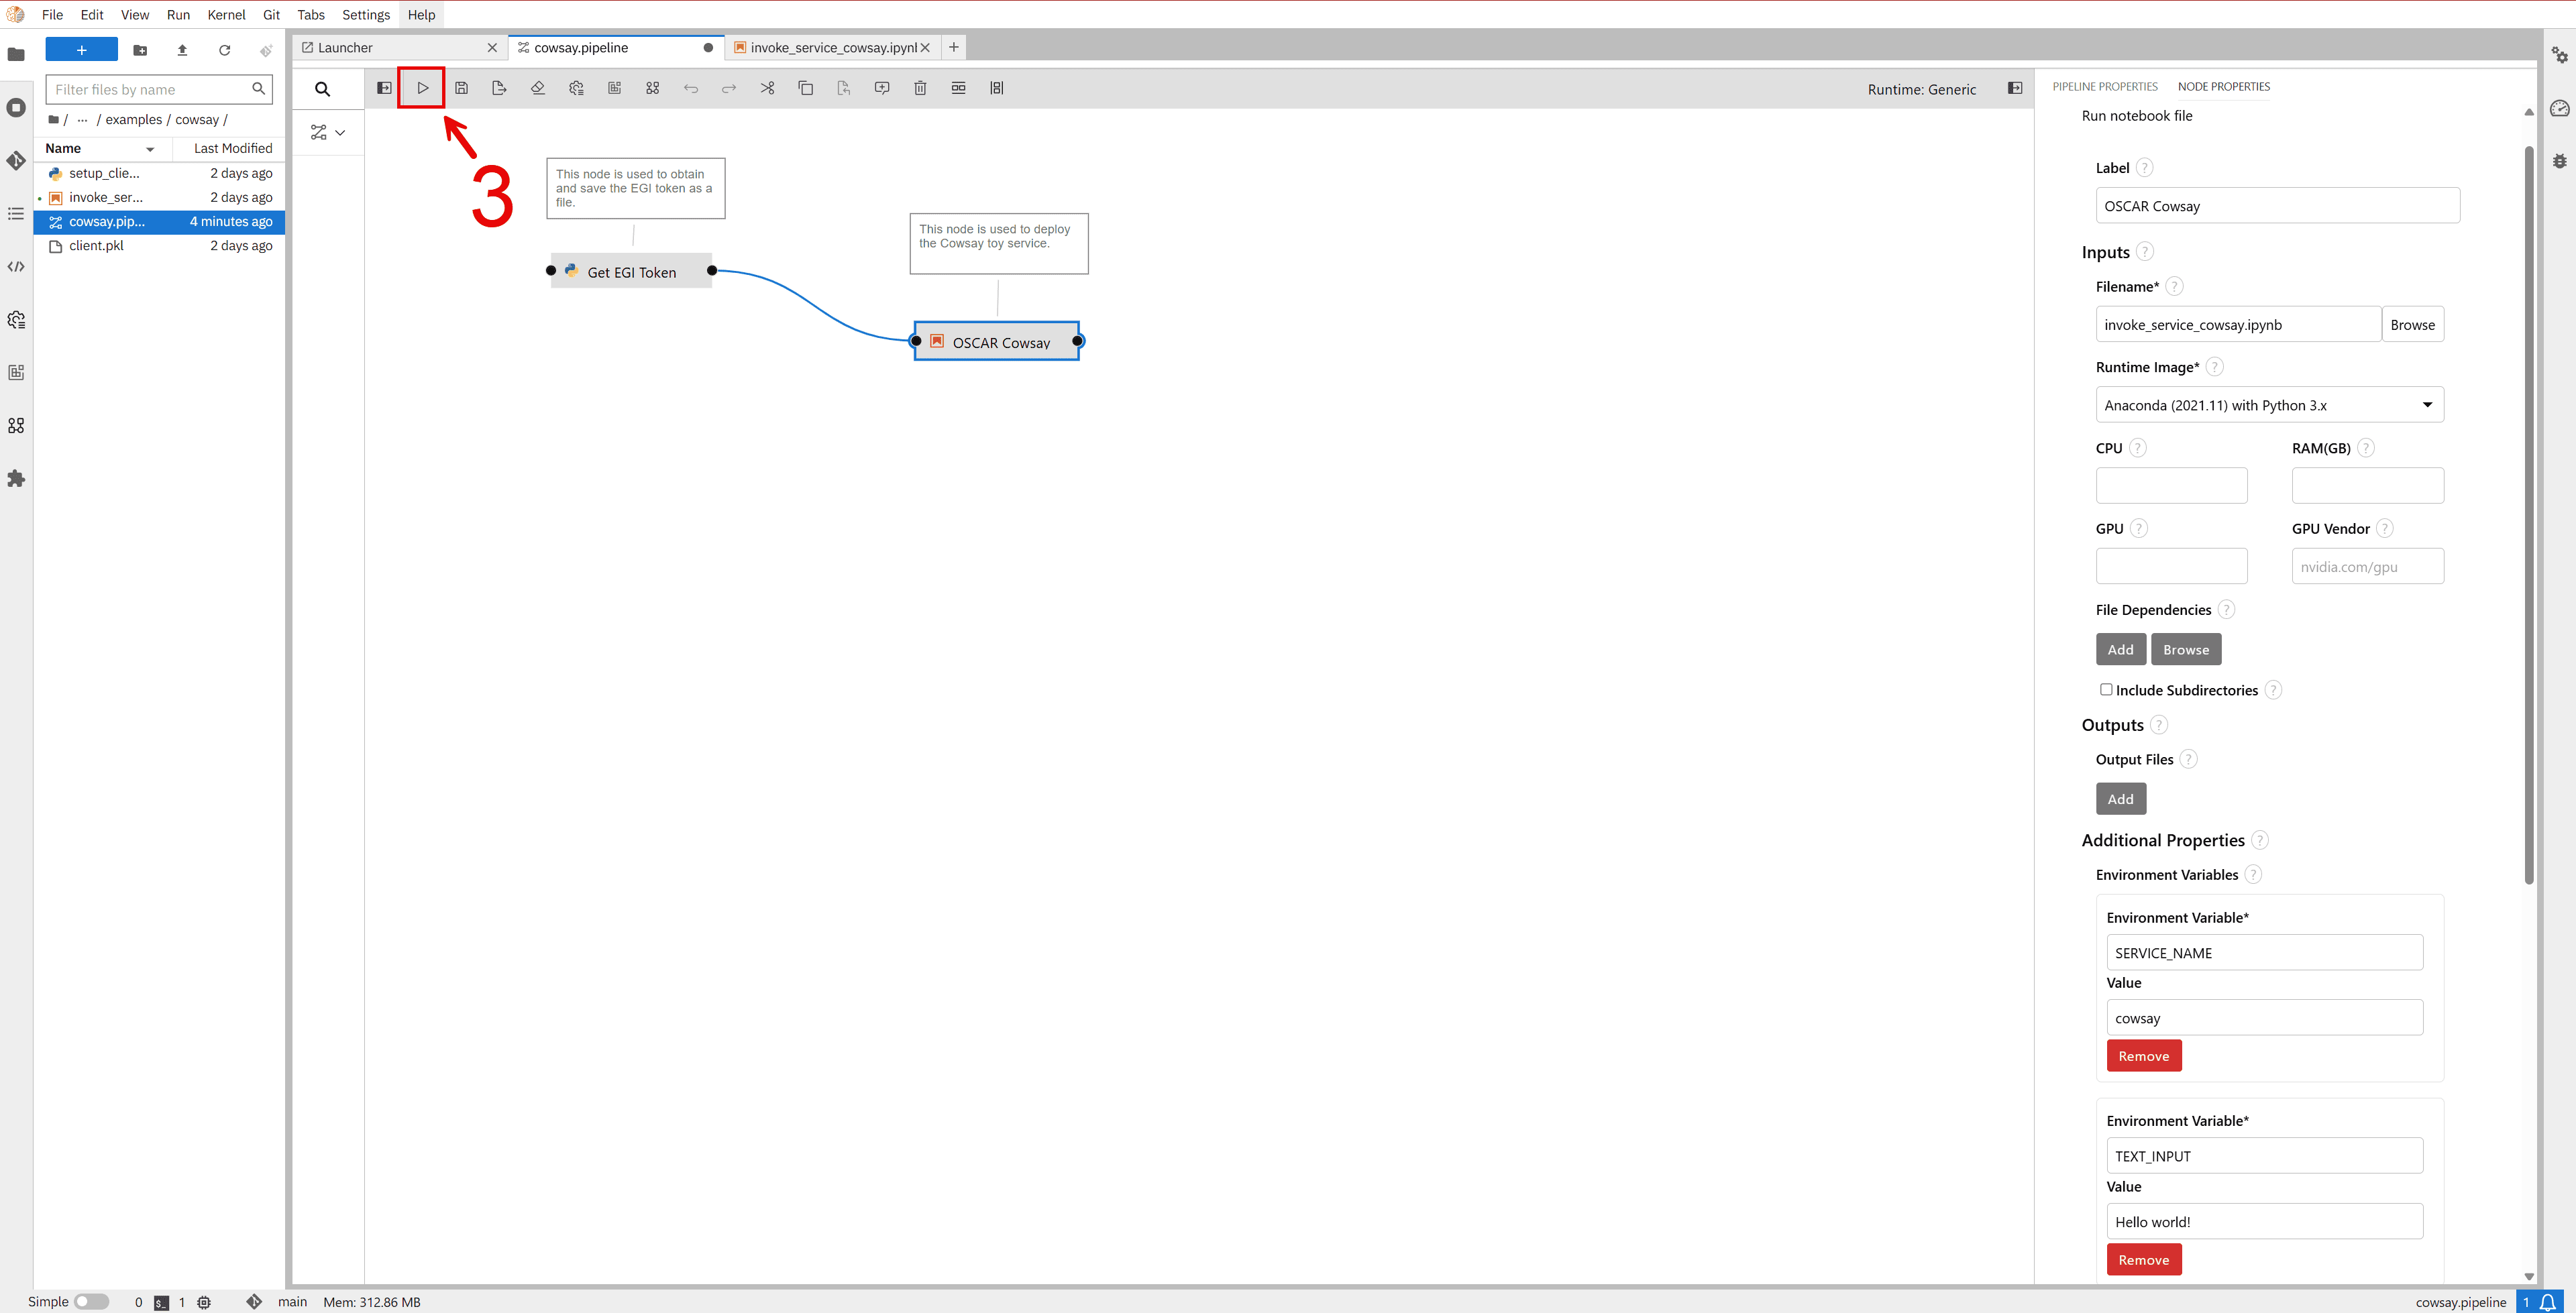
Use the start button to execute the pipeline.
After setting up the environment variables, proceed to the notebook within this node. Once executed, the notebook should display the cow uttering the text you provided.
3.2 Additional Examples: Grayify and Plants-Theano
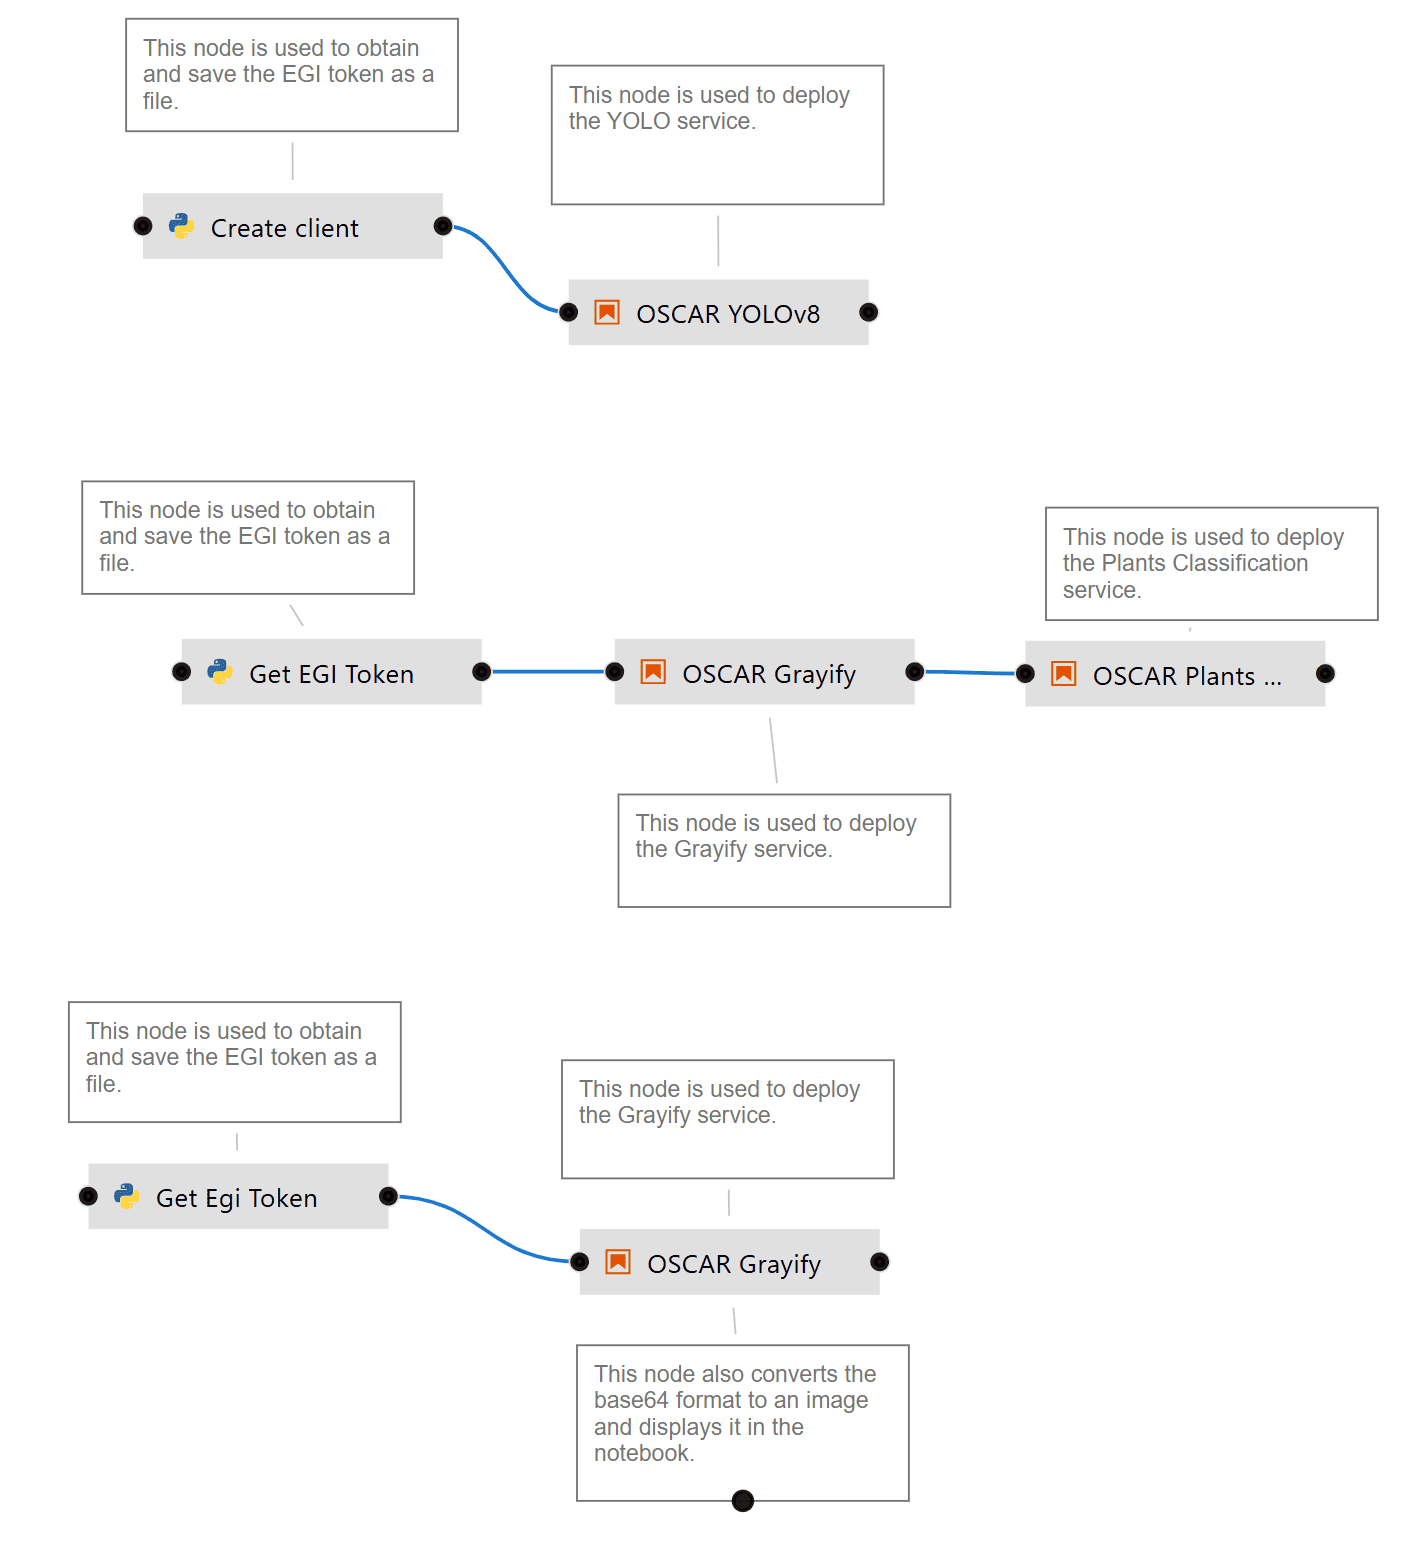
There are many more examples and nodes available in the examples folder that you can explore. These demonstrate different ways to compose functions for inference with OSCAR, as well as additional nodes that perform tasks such as image encoding/decoding and other preprocessing steps.